You have probably been told to master the Pen Tool in Photoshop a thousand times and you might already be pretty good at using it. However, it never hurts to brush up on this crucial skill and learn the secrets of true Pen Tool mastery.
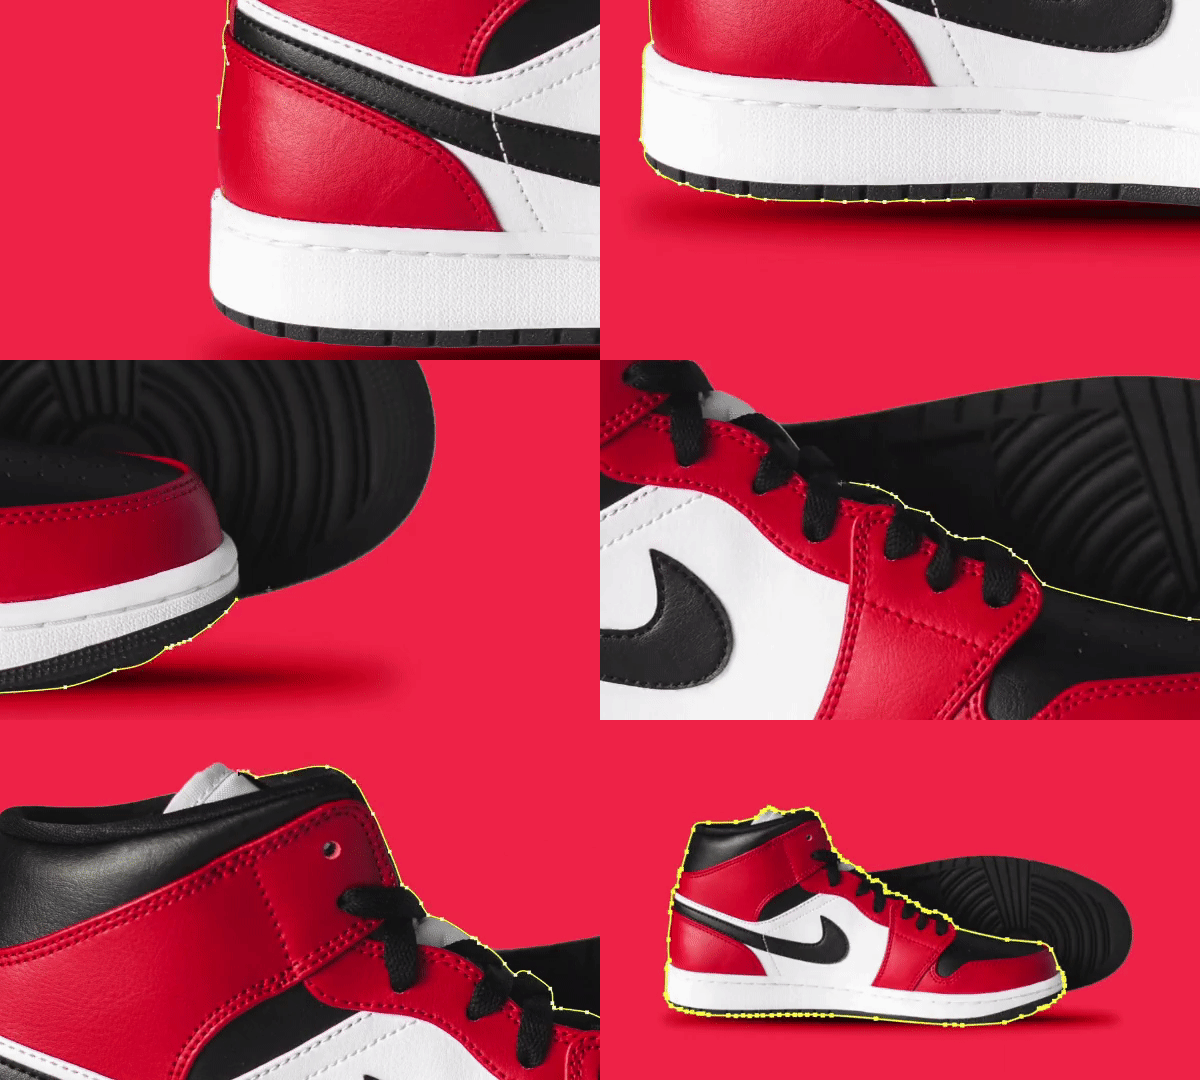
With so many exciting new tools in Photoshop, you may think the pen tool isn’t so important any more. For example, using the Adobe sensei artificial intelligence technology, the object selection tool can automatically snap to the object you want to select. And it can do a pretty good job; however, the edges will not be as perfect and precise as those created using the pen tool.
If you’re not convinced, then check out Martin’s latest video tutorial. Martin shows you why he believes the pen tool is still the best when it comes to making selection of objects with hard edges. By the end, you will understand the power of the pen and how it is a crucial skill to master.
Settings
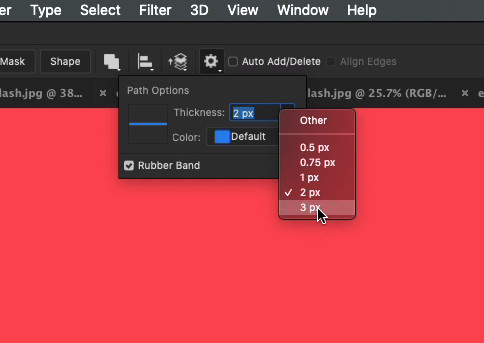
When you select the pen tool, you will get a couple of options in the cogwheel. One option is to change the colour of the outline, which is helpful if the default colour is too similar to the predominant colour of the image.
Another useful option is the rubber band. Turned off, you will only see the next path segment you’re drawing when you let the mouse button go; when you move the cursor, nothing appears. When turned on, the next segment displays before you place it down – giving you a preview before committing to the next anchor point.
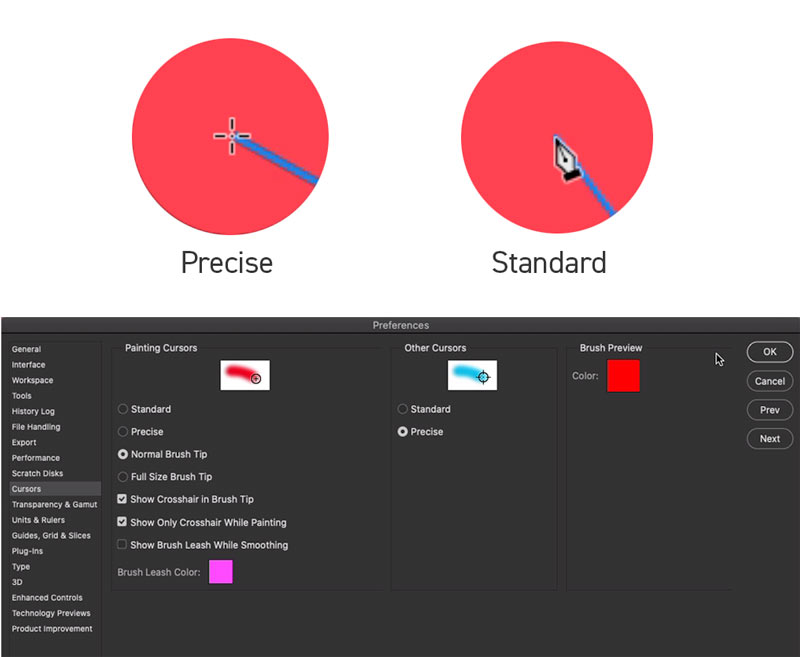
You can also change the cursor from the default standard cursor (pen tool icon) to the precise cursor (a much more subtle crosshair which doesn’t get in the way).
Shortcuts
Make sure you watch the video where Martin illustrates loads of shortcuts that can save you time and give you extra flexibility when working in Photoshop. Below are just a small selection.
Drag anchor point – If you’re not happy with the placement of an anchor point, hold spacebar and move it around.
Create an independent curve – When you create curves, you will have symmetrical handle points that help ensure a smooth transition between segments. If you want a completely different curve, hold down Alt/Opt + Click to create an independent curve.
Refine handle points – Hold Cmd/Ctrl and move it around.
Swap between smooth and corner point – You can change an existing smooth point to a corner point and vice versa by holding the Alt/Opt key and clicking to alter the anchor point.
Create independent segments – You can split direction handles to create independent segments from connected segments. Hold Alt/Opt key, and you can adjust the points independently. Use Cmd/Ctrl key, and they move together.
Start a new path – If you hold Cmd/Ctrl + Click, you don’t have to switch to a different tool, you can start drawing a new path, and later on, you can connect them to become a single path.
Creating a Vector Mask
The pen tool and the vector mask together is the best method for creating selections non-destructively on objects. Once you’ve created the whole path, you can make a vector mask by holding the Cmd/Ctrl key and clicking on the ‘Add vector mask’ icon.

It’s now that you can adjust and tidy the selection which is so easy with the pen tool. You can zoom in to the detail and alter the path using the direct selection tool or use the arrow keys to push points around. If you select multiple anchor points, you can move them at the same time using the arrow keys.
If you don’t want to end up chipping away at the object too much, you can create a clipping mask and sample a colour from close to where you would like to refine. To avoid this overriding the texture, you can change the blend mode to colour. Cleverly it only alters the colour and not the texture – pretty cool right?
The Curvature Tool
The curvature tool is an alternative to the pen tool that automatically creates curves, so it is ideal if you are working with an object where there are very few straight lines. Watch the video as Martin creates a path around a curved beer bottle.
Generally, it does a pretty good job, but if you want to refine the details, you can hold Cmd/Ctrl and move the anchor points around without having to alter direction handles or anchor points. If you double click on an existing anchor point, it will turn it into a sharp corner and turn it back again with another double click. If you use the pen tool and curvature tool a lot, you can assign shortcuts so that you can quickly switch back and forth between the two.
A great time-saving tip with symmetrical objects (like a beer bottle), is to draw half of the selection and then duplicate the path. By holding Alt/Opt and dragging the path, you create a duplicate. Using the free transform tool, you can put a minus before the W value in the control bar and click enter, which flips the details allowing you to join the two paths together into a single path. Follow along with Martin in the video for clarity.
Combining Multiple Paths
It’s also beneficial to learn how to combine multiple paths to create a single vector mask so you can, for example, get rid of hollow details within an object. After completing the mask for the outline, with the pen tool selected, switch to ‘Subtract Front Shape’ in the top control bar, and you can have as many paths as you want within the same vector mask, which you can individually refine as needed.
Conclusion
Hopefully, you now have a better understanding of how powerful the pen tool is. In these examples, Martin focuses on using the pen tool to make selections and extracting details from backgrounds, but you can also use it for so many other things.
These include adding shading on specific details (the video explains how), and drawing lines, dashed lines and shapes. And the best bit is that everything is non-destructive, which is how you want to be working in Photoshop. Make sure you watch the video to learn the secrets of true pen tool mastery.
If you enjoyed this tutorial, then you may like the following:
UP NEXT
We will take a look at three core Masking techniques in Photoshop including Pixel Layer Masks, Vector Layer Mask and Clipping Mask!
