Welcome to the second instalment in Martin’s video series on how to get better at Drawing to help you improve your drawing skills.
This latest video is going to help you get the correct proportions in your drawings, and help you to create professional images.
Check out the video where Martin runs through some great examples, talking you through how to avoid common pitfalls including:
Tip 1: Learn from others
The hairline – Unsymmetrical hairlines can cause the eyes to shift and distort, and create issues with the placement of the jawline.
Strong expressions – It is more challenging to get the proportions right when drawing a really expressive face. It can cause the chin and jawline to lose their symmetry, and even shift the placement of ears and eyes.
Facial symmetry – While faces aren’t perfectly symmetrical, there should only be minor differences between the two sides. If working on paper, try placing a mirror next to the drawing to see the reflection. It’s much easier to check the symmetry when working digitally, which Martin explains next.
Tip 2: Symmetry Feature
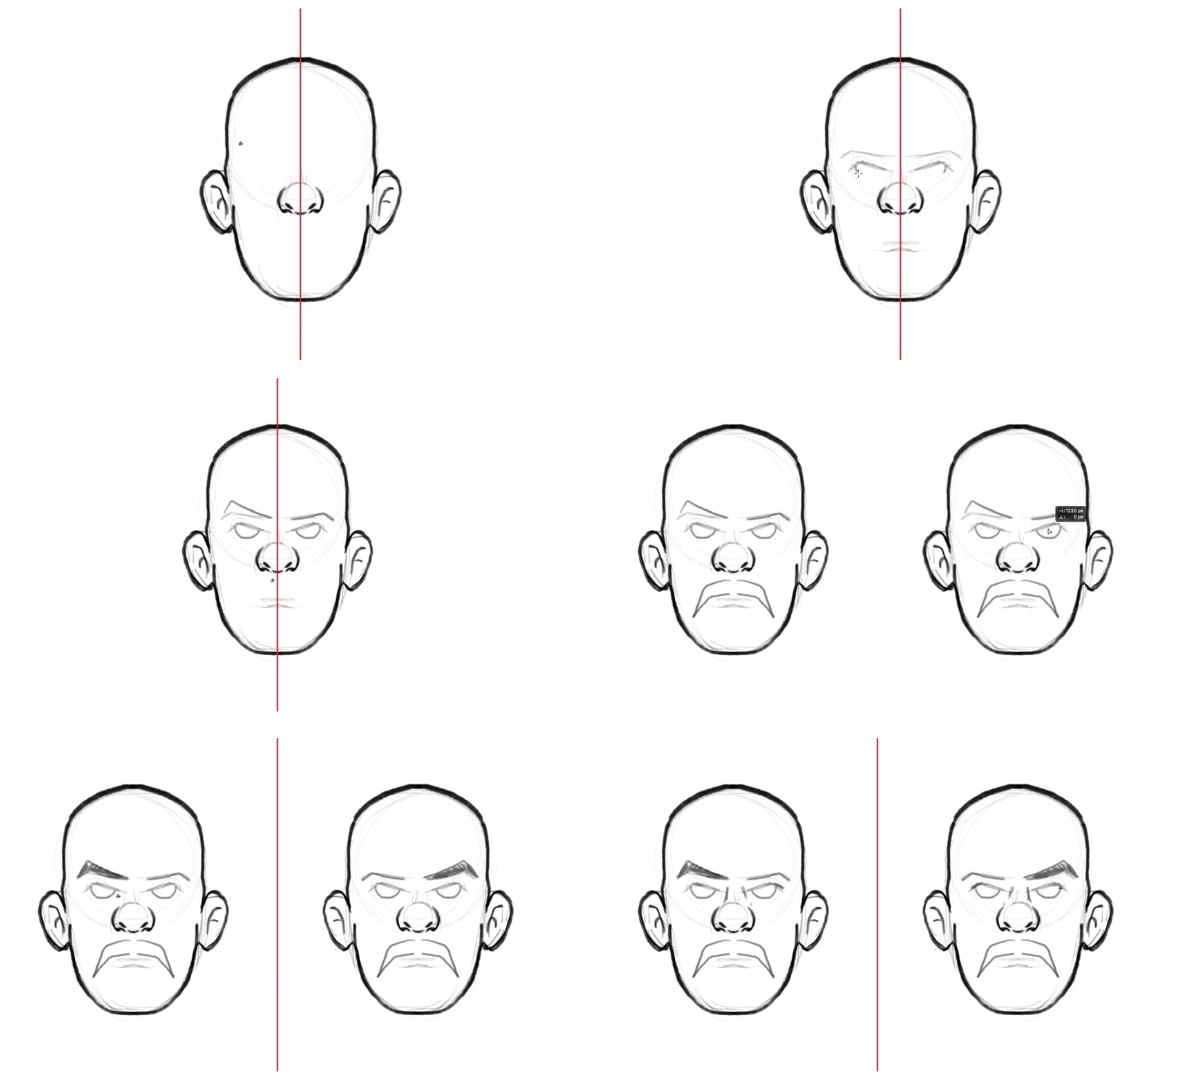
A great tool in Photoshop is the symmetry feature which you can turn on and off in the options bar at the top. You can align the centre point where you need it on your drawing, and as you draw on one side, it replicates these lines on the other side. You can draw on either side of the centre point, and it will reproduce the same line on the opposite side, which is incredibly useful when trying to keep things symmetrical.
If you want to have different details on one side, you can turn the feature off, and then turn on again and continue as necessary. Pretty cool right?
Tip 3: Duplicate Image
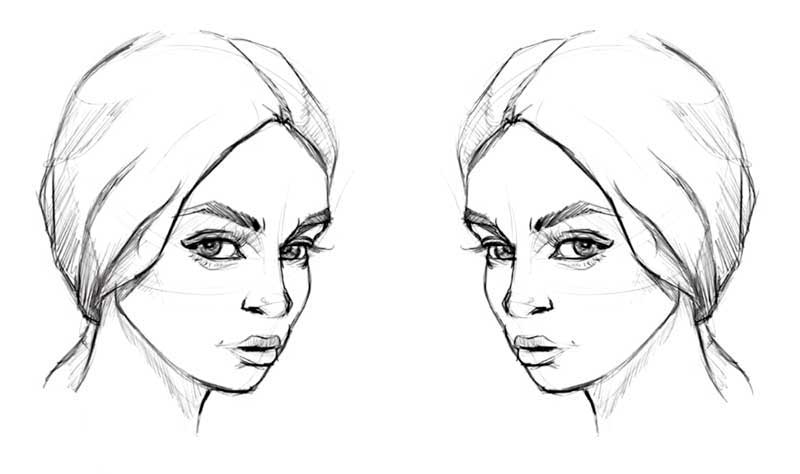
Another useful option is to duplicate your drawing, which is incredibly helpful to check the details you are adding are going to work. By working on both of the images, so adding details to one image and then the other, it helps you keep a fresh eye while you are drawing.
In Photoshop, you can flip your drawing by going to the edit menu and choosing flip horizontal from the transform path option. Now when you draw with symmetry on, the results will show on both sides at the same time.
In Procreate, you can extend your canvas, then duplicate the artwork from the layers panel, and move the copy over with the selection tool. You need to flip the image horizontally and turn on the drawing guide option. When you select the symmetry option at the bottom, changes will show on both images. Please watch tutorial for full details.
Tip 4: Flip Canvas
If you don’t want to duplicate the image, you can flip your canvas periodically. Flipping the canvas is another useful tip to help you spot inconsistencies in the proportions. As you work on the same drawing, your eye gets used to seeing the image one way, but as soon as it’s flipped, errors can jump out at you.
The more often you flip the canvas, the better, as it helps you to keep working with a fresh eye and avoid hidden mistakes.
Conclusion
For a quick demo of what we’ve covered here, make sure you watch the video to see Martin in action. Whether you fancy trying out the powerful symmetry feature or merely flipping the canvas, these simple tips will help you get proportions and details right. Keeping a fresh eye allows you to immediately spot errors as you go along to create that perfect professional drawing.
Are you interested in becoming a Graphic Designer or Illustrator?
Join 10,000+ creatives and subscribe to our FREE Graphic Design Survival Kit newsletter.
You’ll get instant access to our resource library and feel well equipped to make that next big leap in your design career.
Recap: How to draw - Part 1
Missed the first part on how to get better at drawing? Check out the following two tutorials!
In this tutorial, we will demonstrate how to progress from rough and unsure sketches to smooth and confident drawings!
In this video we are going to demonstrate to you what makes drawing faces so hard and how can you improve your skills to get better at drawing them.
UP NEXT
Find the Top drawing apps for the iPad, used by creative professionals

