adding grain textures to your illustration
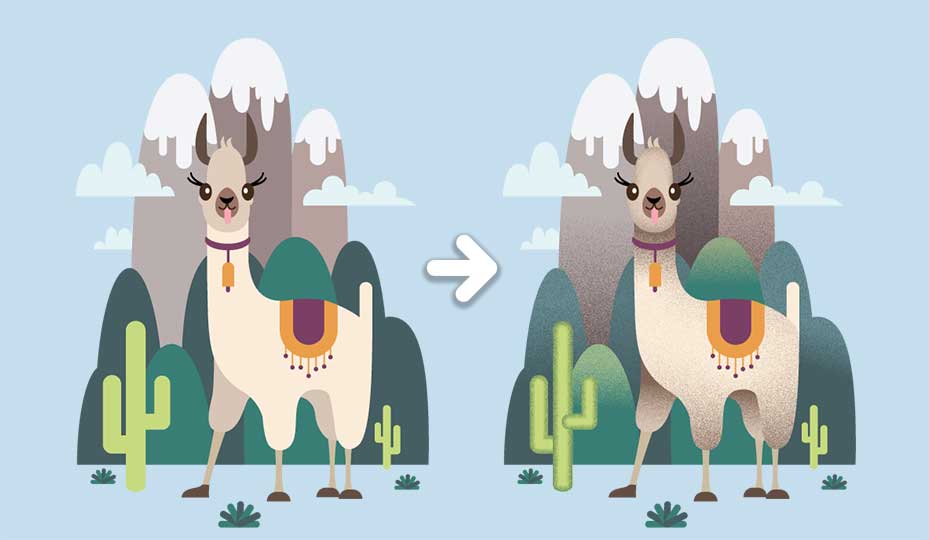
Do you want to learn how to take your illustration and add an extra flair to your character with textures? Follow our simple step by step process to get started.
You can follow along using your own examples to create grain texture in Adobe Illustrator. For best practice, we highly recommend you watch the full tutorial and learn the methods of adding grain textures to your illustration!
adding grain textures - Part 1
Here is an overview of the process. We will add Grain Texture to the hill behind the Lama!
1.Copy the object using Cmd/Ctrl C

2. Paste in front using keyboard shortcut Cmd/Ctrl F to place the duplicate object on top the previous object
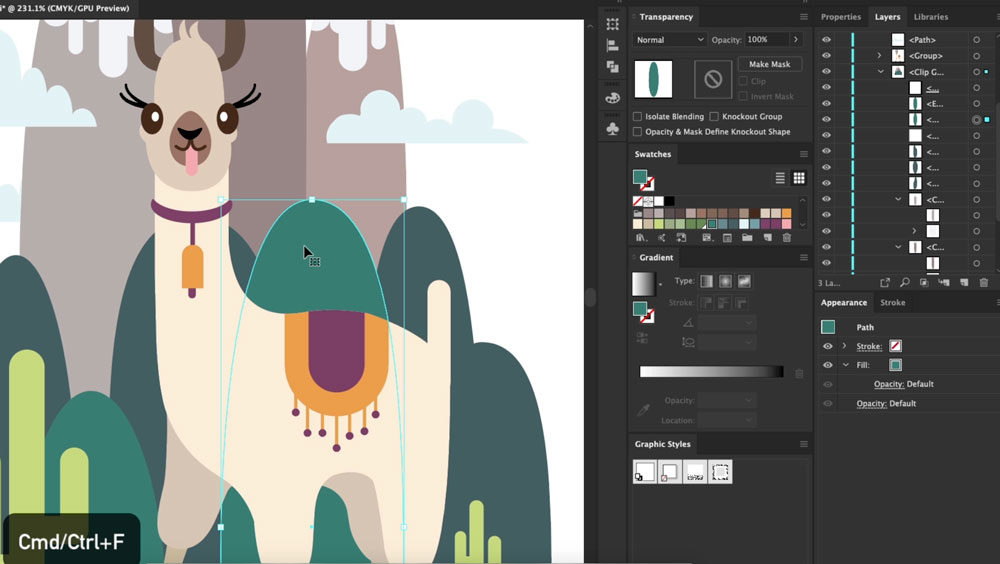
3. Keep the object selected and apply Make Mask on it from the Transparency panel
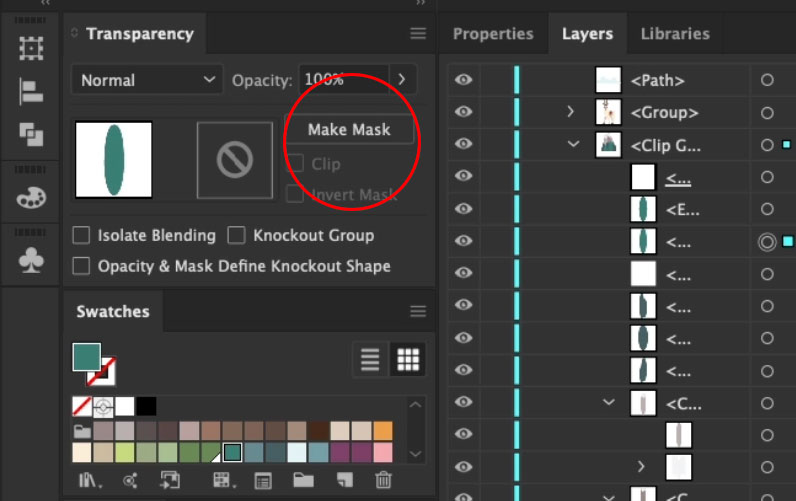
4. Then Invert the Mask
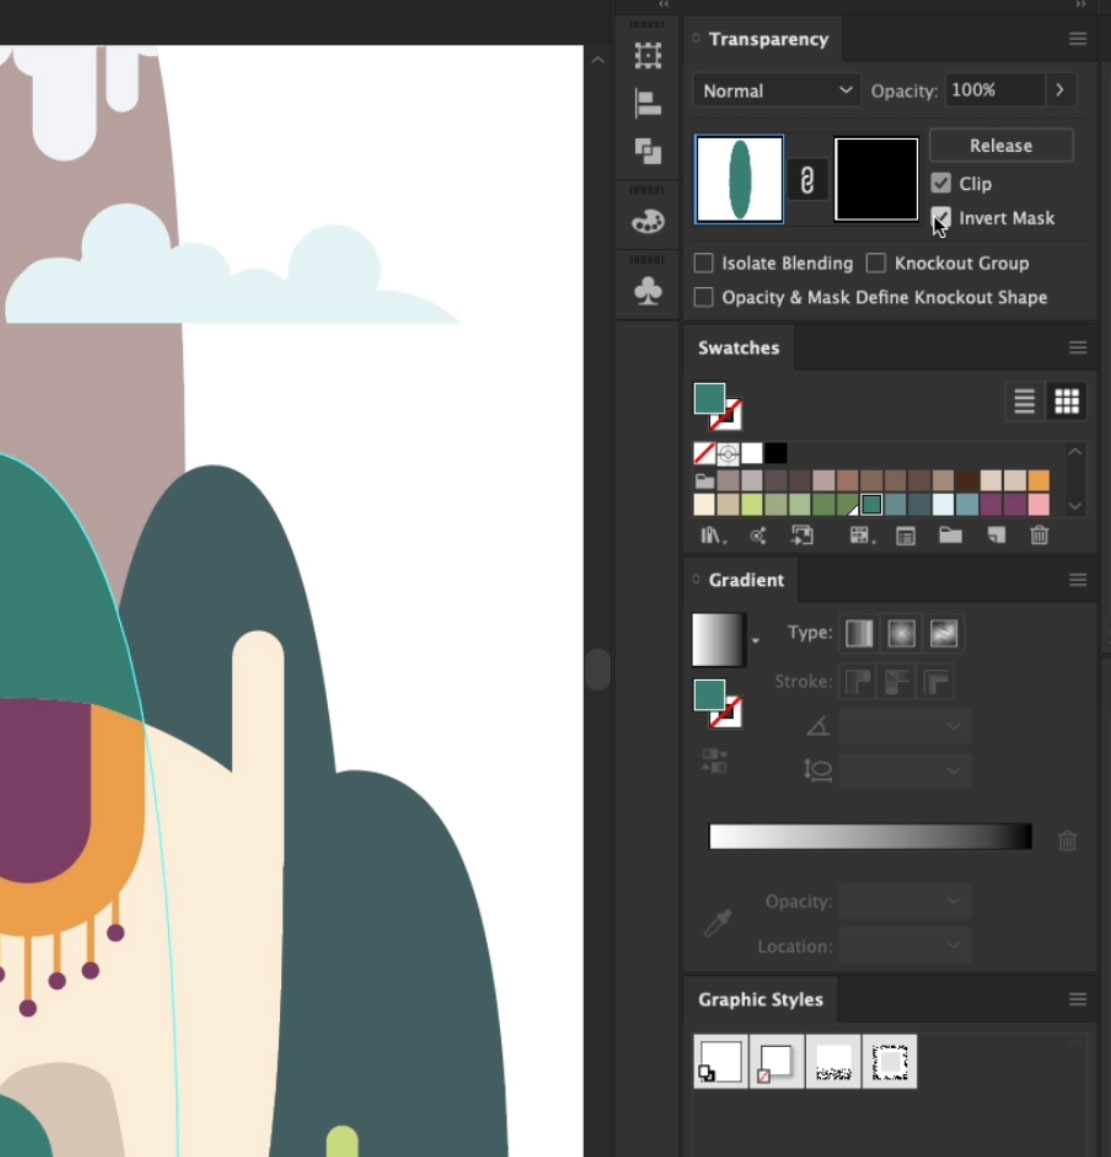
5. Once inverted, select the Mask (also known as Opacity Mask).
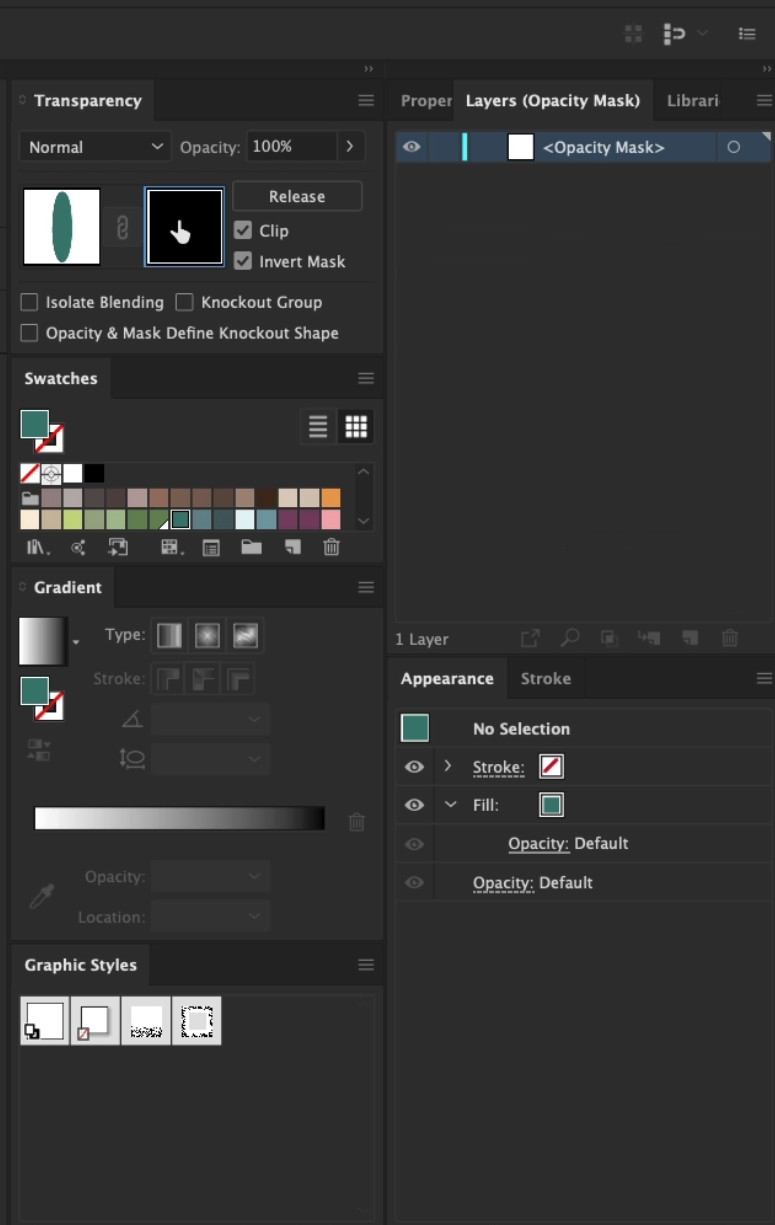
6. Once again, Using Cmd/Ctrl F, paste in your object on the Mask
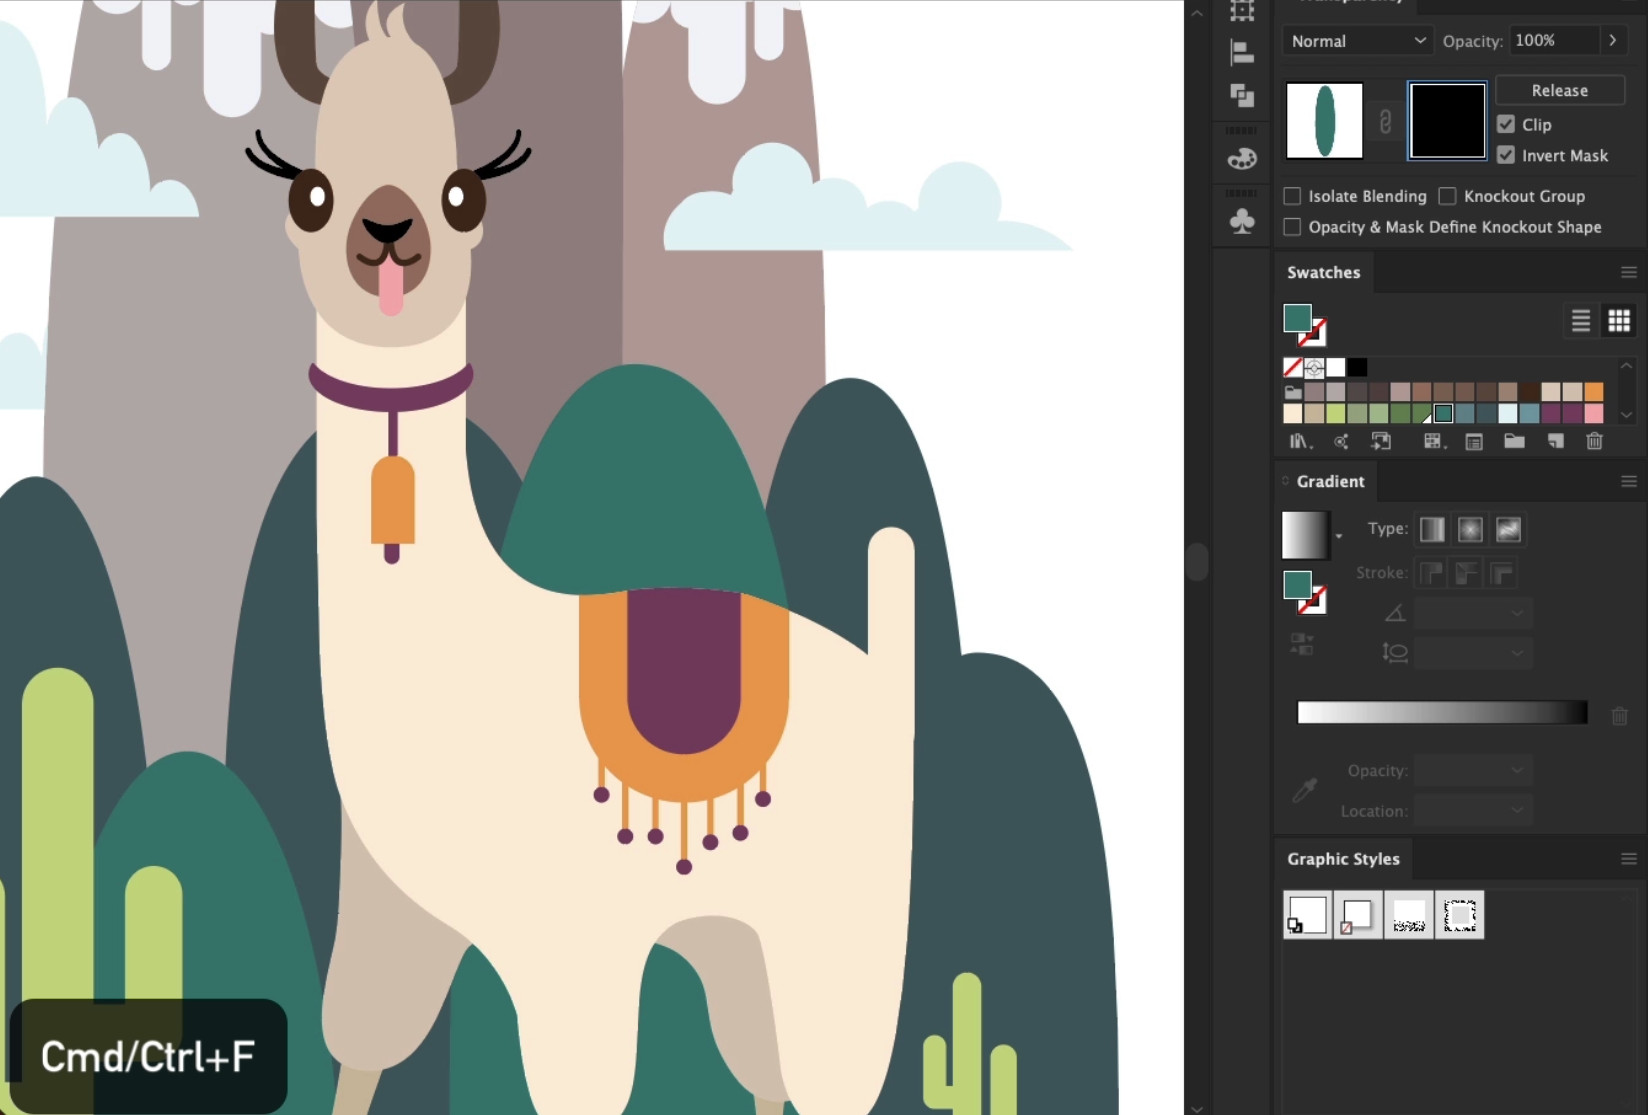
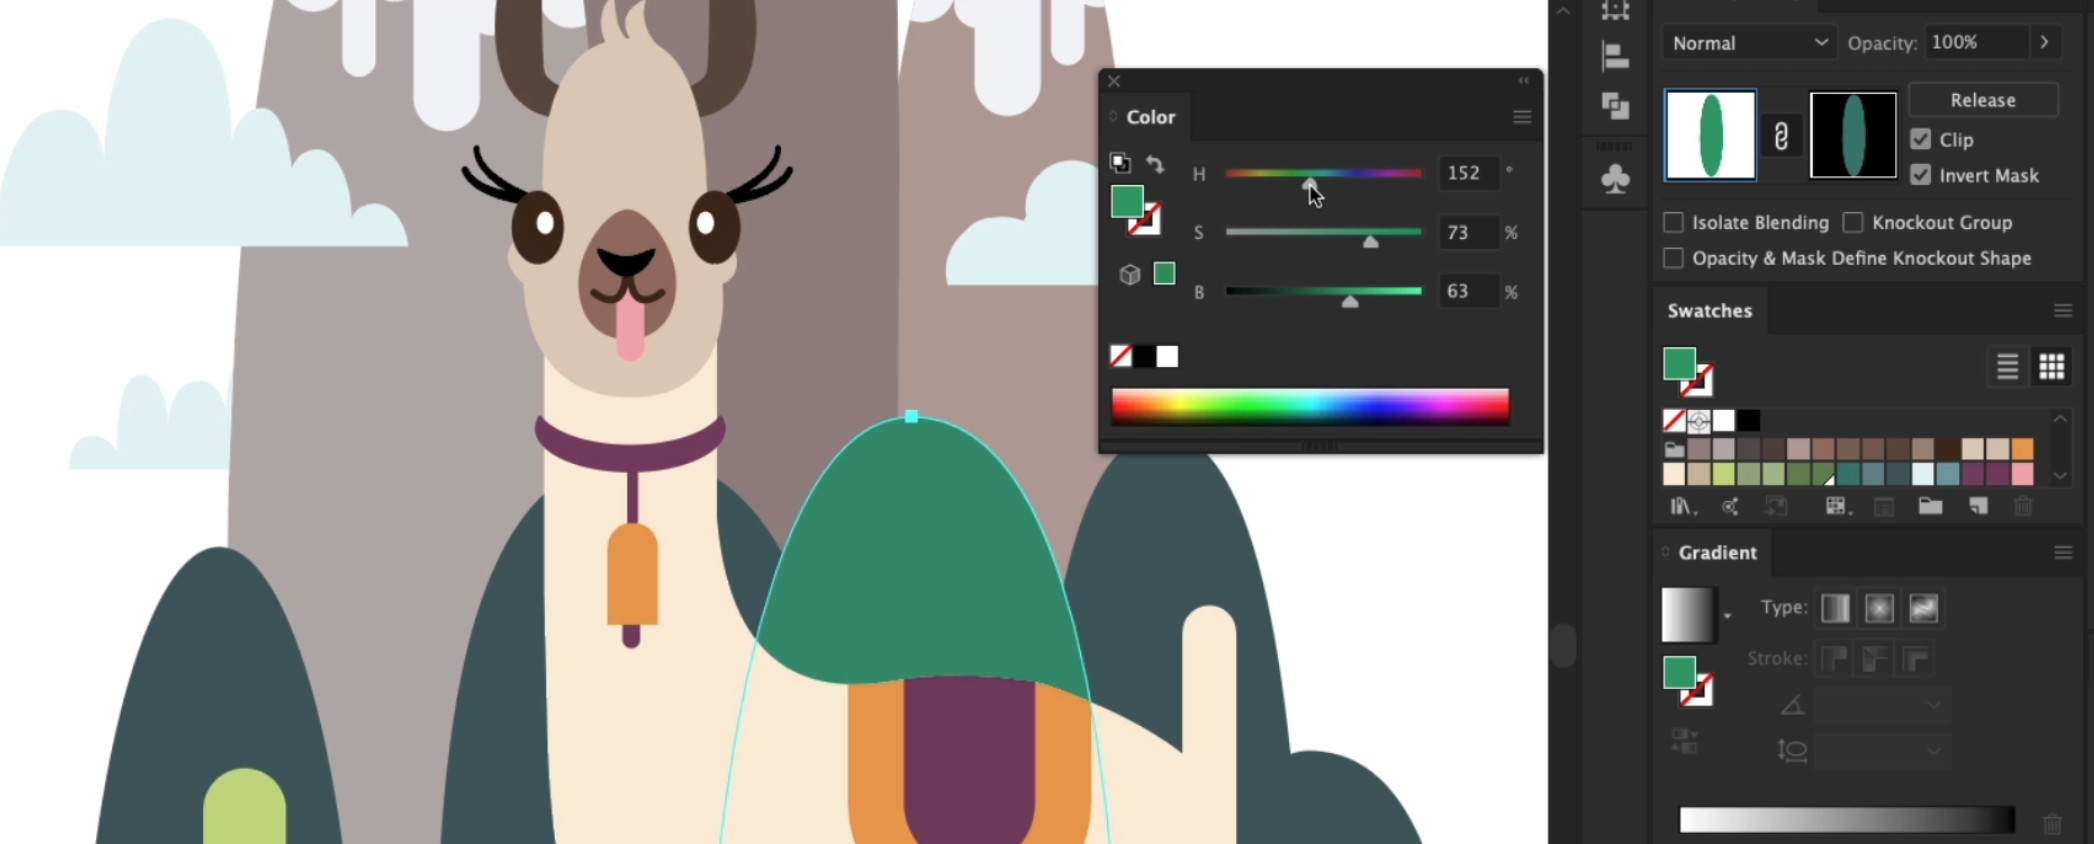
7. Now switch back to the original object and change the Hues to make it brighter than the original colour
8. Now switch back to the Opacity Mask mode and add a Fill using the Appearance Panal
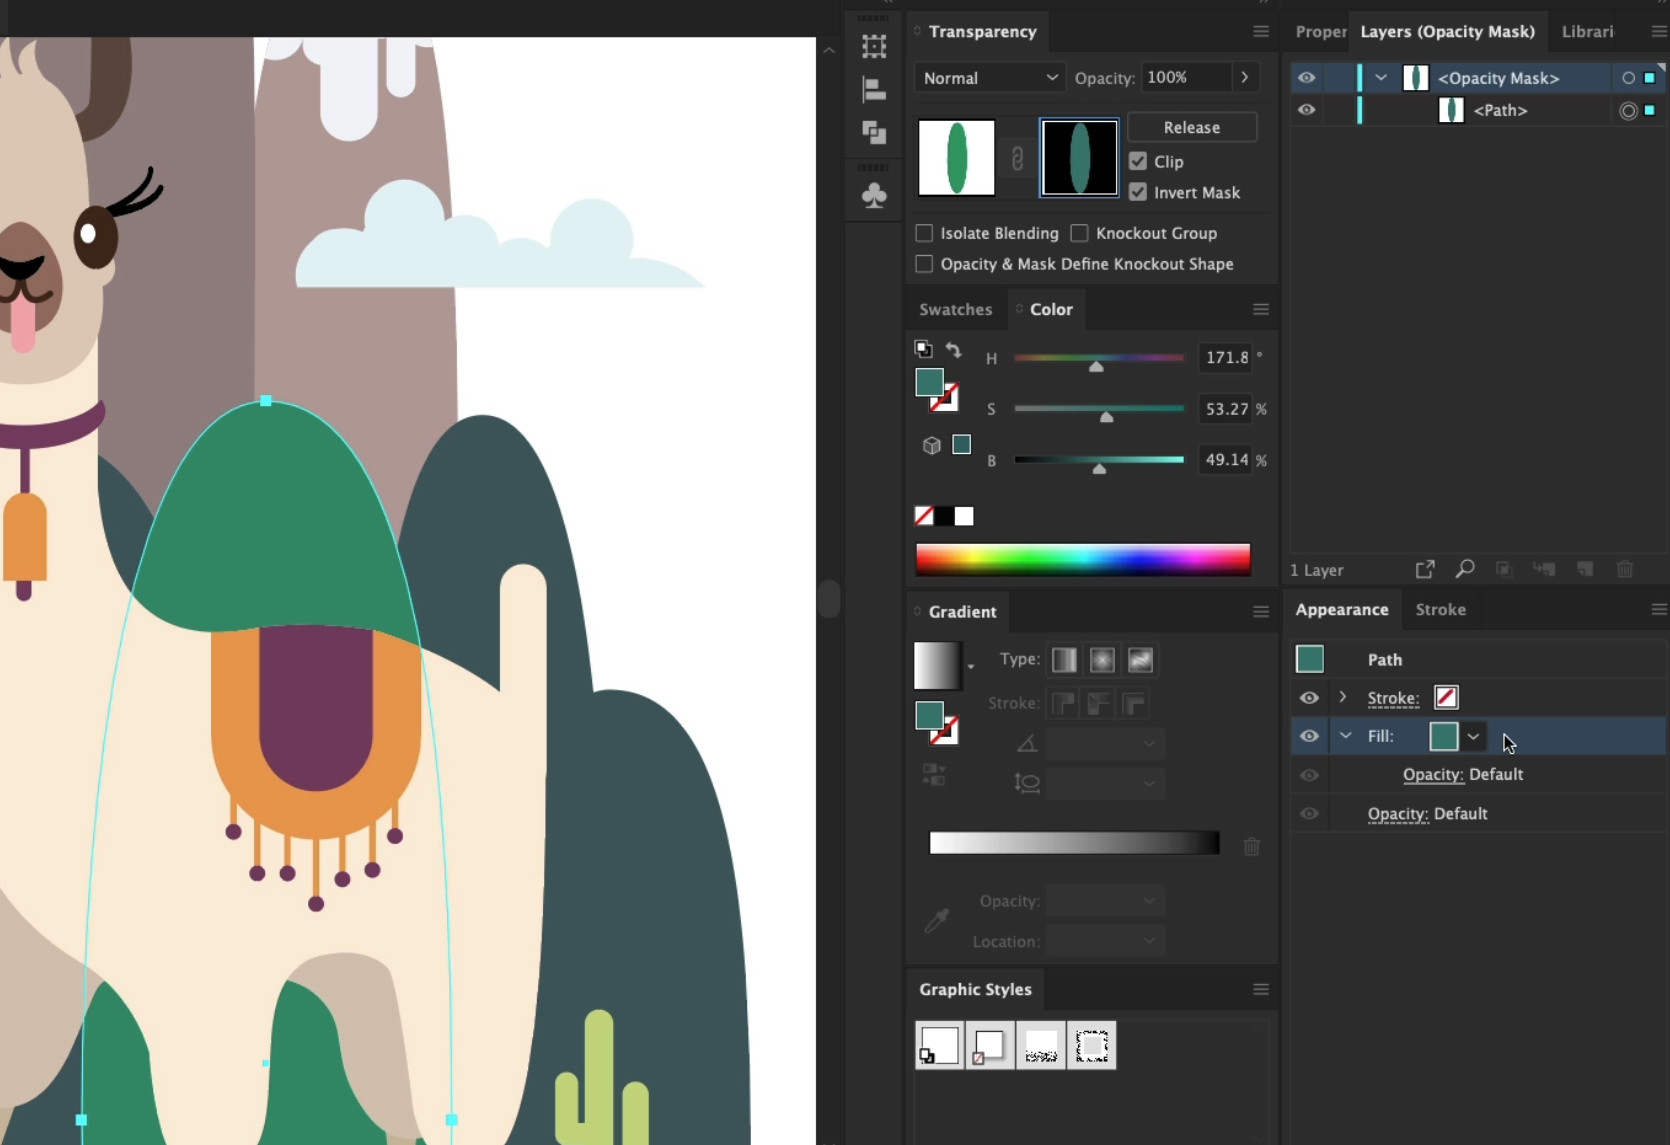
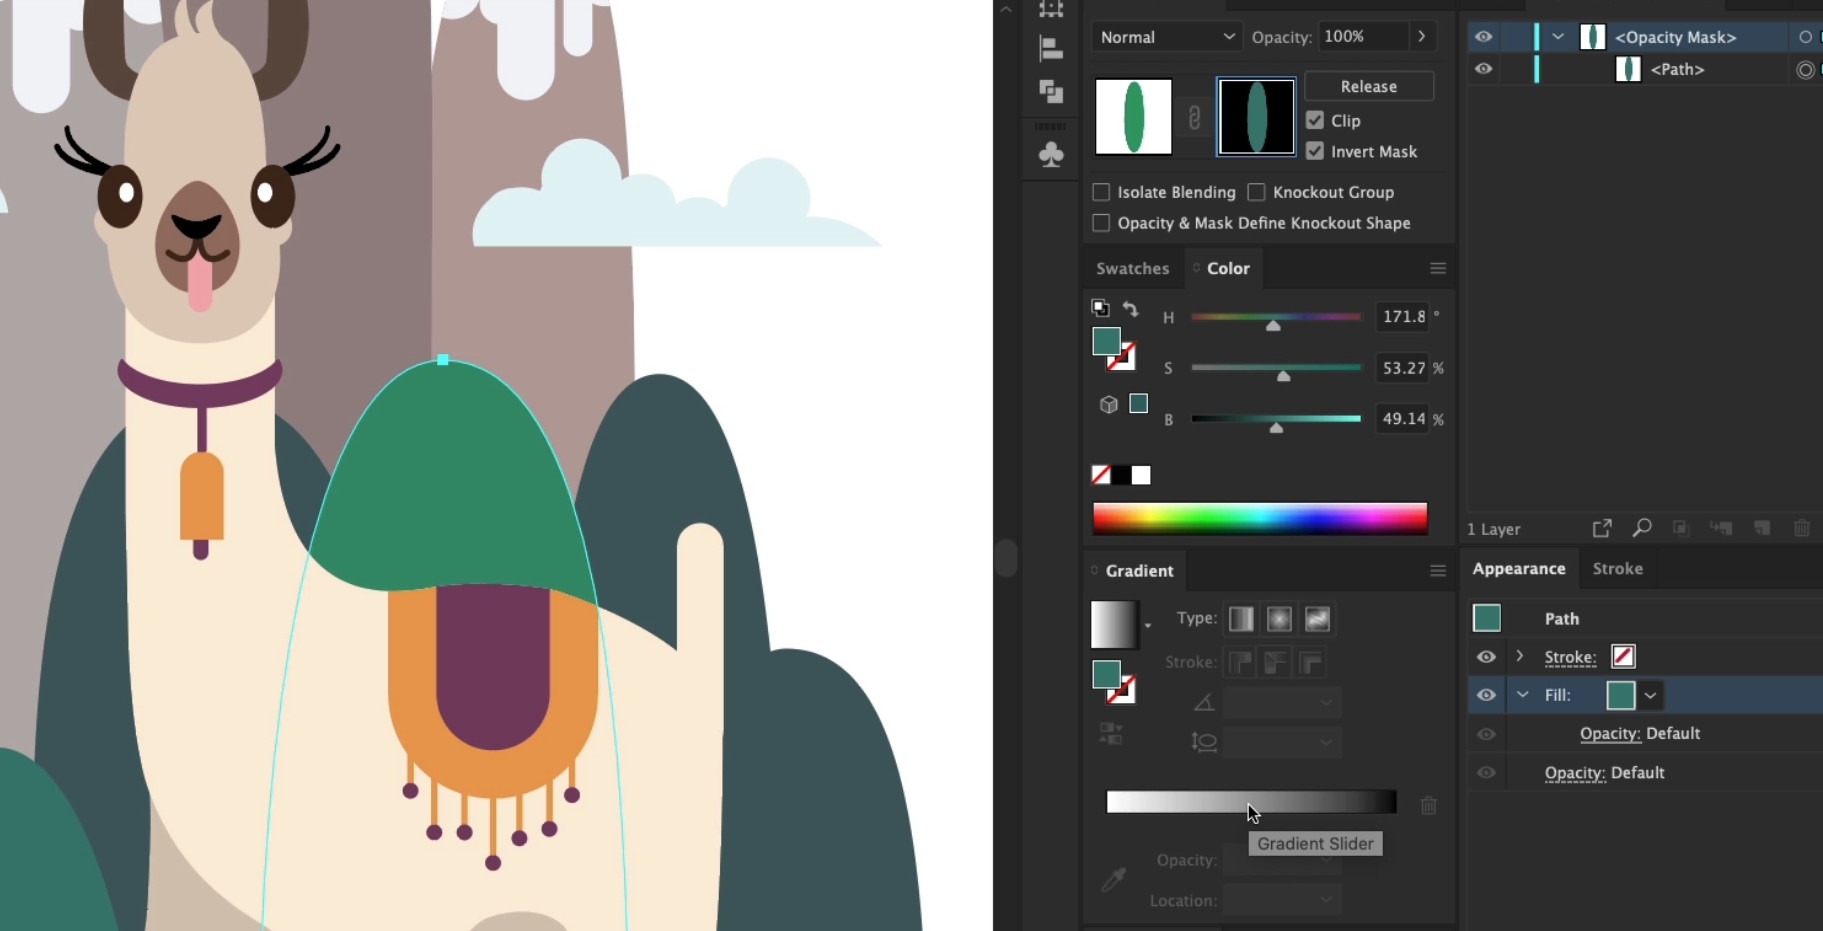
9. Click on the Gradient Slider to a add the Gradient, at this stage you wont see the effect yet!
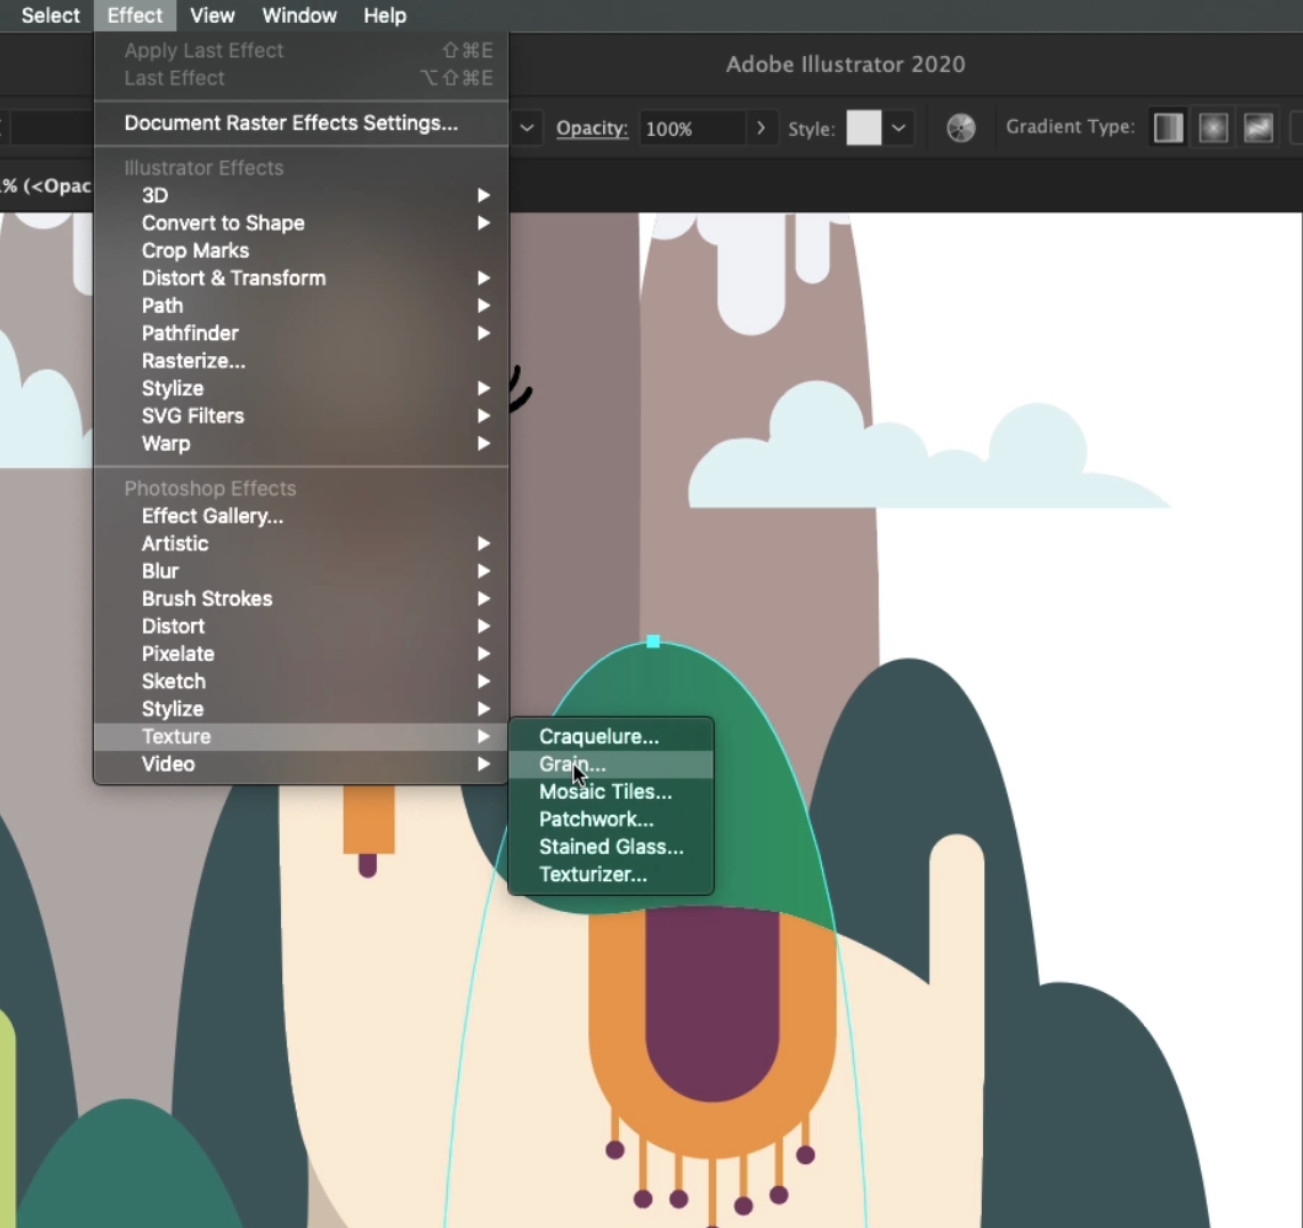
10. Now you are ready to add the Texture, Choose a Texture, Grain option from the Effect Menu. The Grain menu will open in a separate panel.
11. Use Stippled Grain type along with the following settings, feel free to use the same values or choose your own preference!
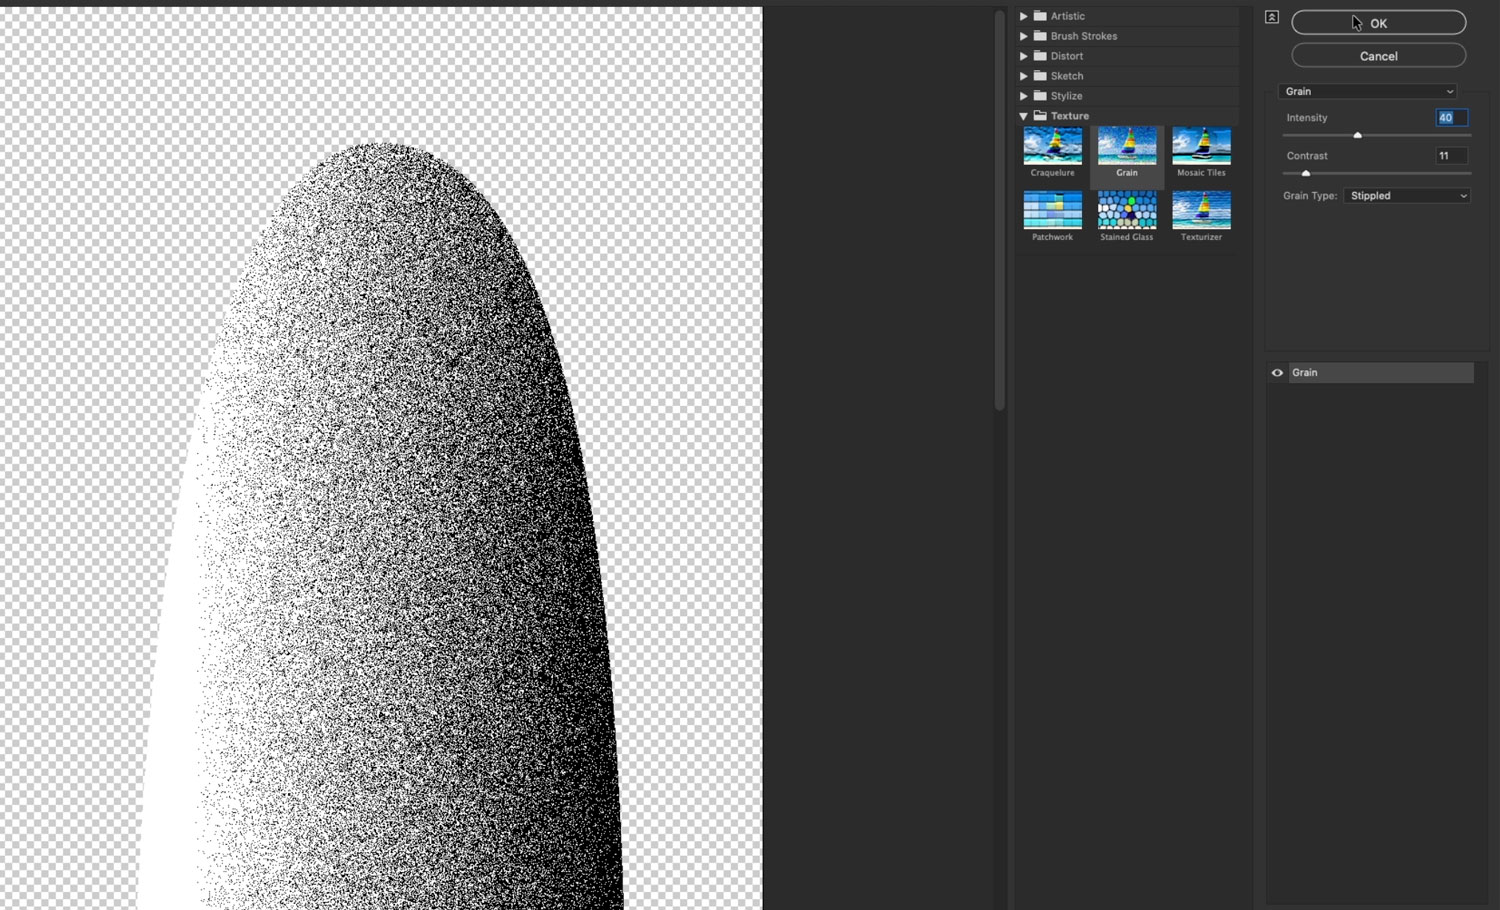
12. There you have it, you have created your Grain Effect Texture! use keyboard
shortcut G to change the direction and size of your Texture.
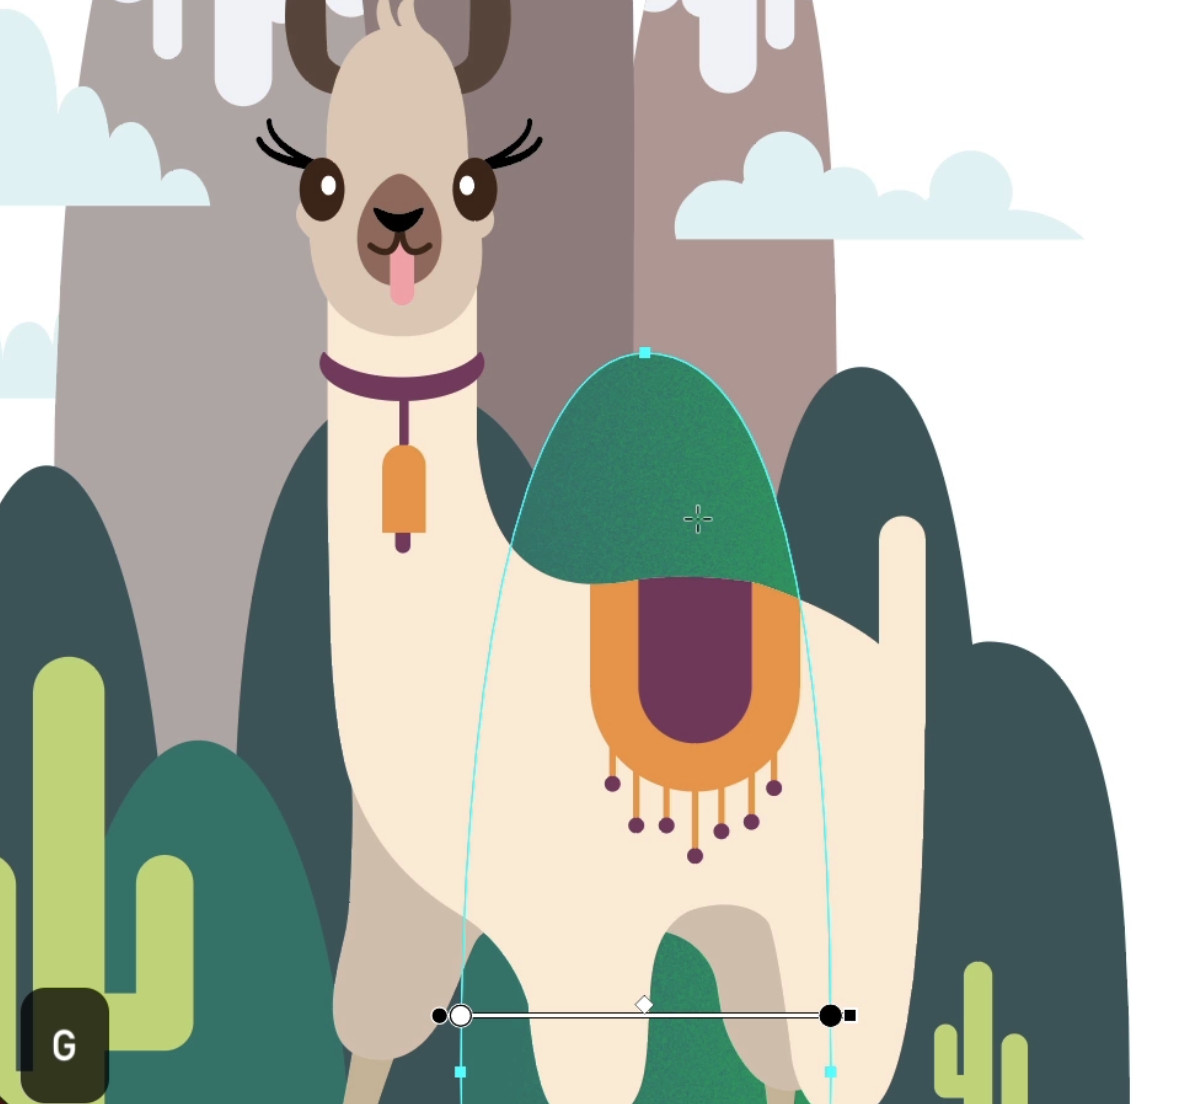
We feel that this is the best way of creating the Grain texture effect in Adobe Illustrator with a non-destructive workflow. You can still alter and make changes to the color and intensity of the grain.
As mentioned earlier, we highly advise you to watch and follow along to the tutorial if you want to learn to add textures like a pro. The tutorial will go into detail on how to work with Textures with linear, radial and freeform gradients.
Ready to take your Textures to the next level? Watch the below tutoial for my advanced methods to utilise the Grain effect. This time we will be using it on gradient meshes and gradients along strokes.
Adding Grain Textures - Part 2
UP NEXT
Compare two ways to create Gradients in Adobe Illustrator. So you can pick the right method for the right project!
MASTER ADOBE ILLUSTRATOR
from one of the best Adobe Certified Instructors in the World*
* Martin has been voted as one of the top 10 Adobe Instructors in the World


