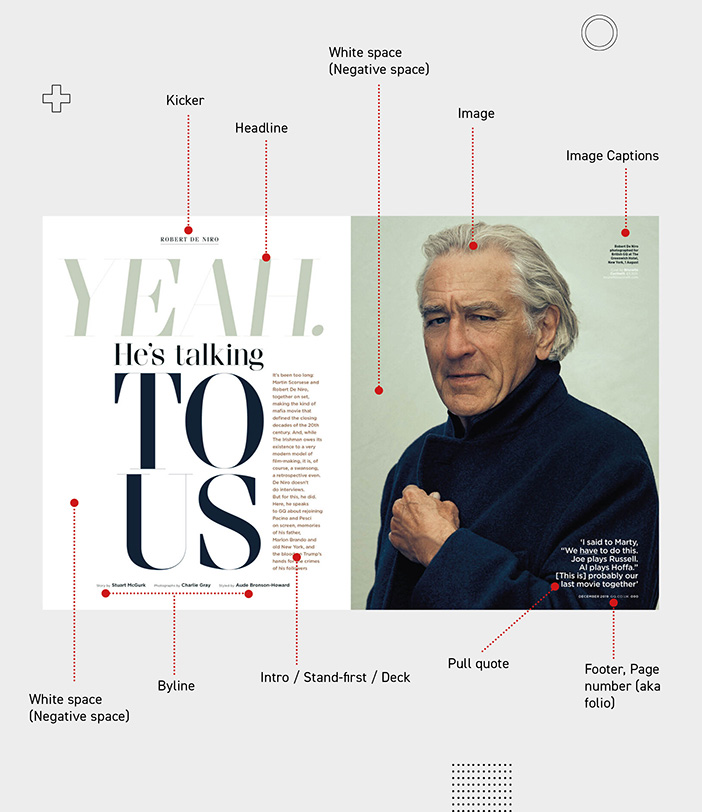
Save time when working on Magazines, Books or Catalogues
Do you want to save time and stress when working on long-format documents such as magazines, books and catalogues?
A running header is an important editorial design element that is commonly used. It usually appears at the top left of each page of a document, and is a replica of the title of that particular page or section.
Martin’s latest tutorial shows you how to set up a universal running header for a magazine in Adobe InDesign by using a text variable with a character style. This creates a header that is linked to the page title so that it updates automatically if the text is changed.
The video tutorial allows you to follow along with Martin as he takes you through the steps, so we would recommend you check it out, but below you will find a summary of the four different stages.
1. Set up a character style
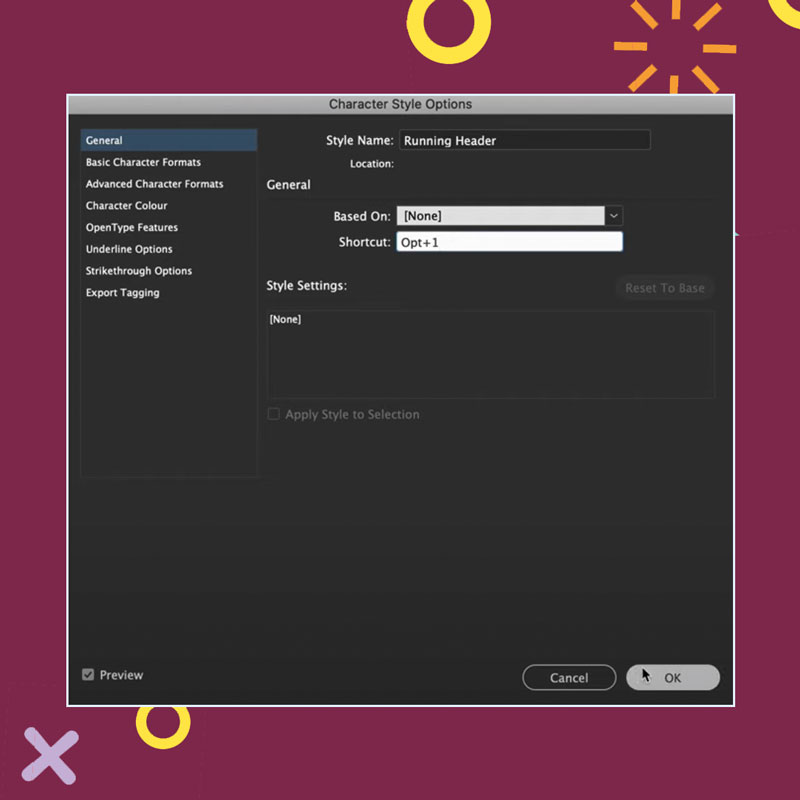
Titles on different spreads are likely to be formatted differently. To be able to keep the formatting but still be able to use the same running header definition, we need to create a blank character style.
This means when the style is applied, no changes will be made to the text itself, but it will be recognized as a running header.
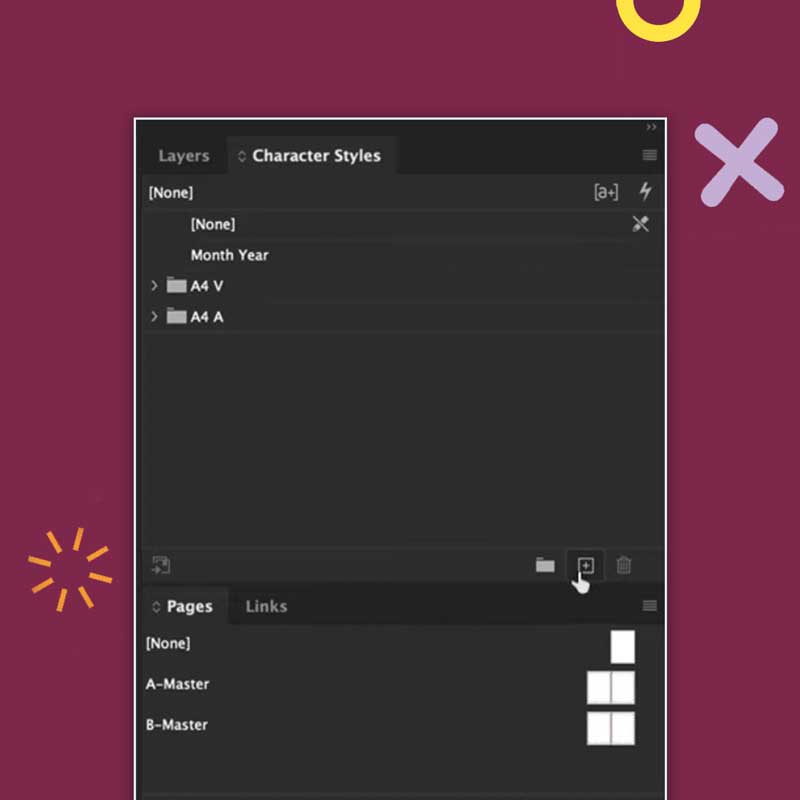
To set up the character style, make sure everything in the spread is deselected and click on the + sign in the character styles panel (found under Styles in the Window menu). You can rename this blank character style to whatever you want and even assign a shortcut.
2. Set up the text variable
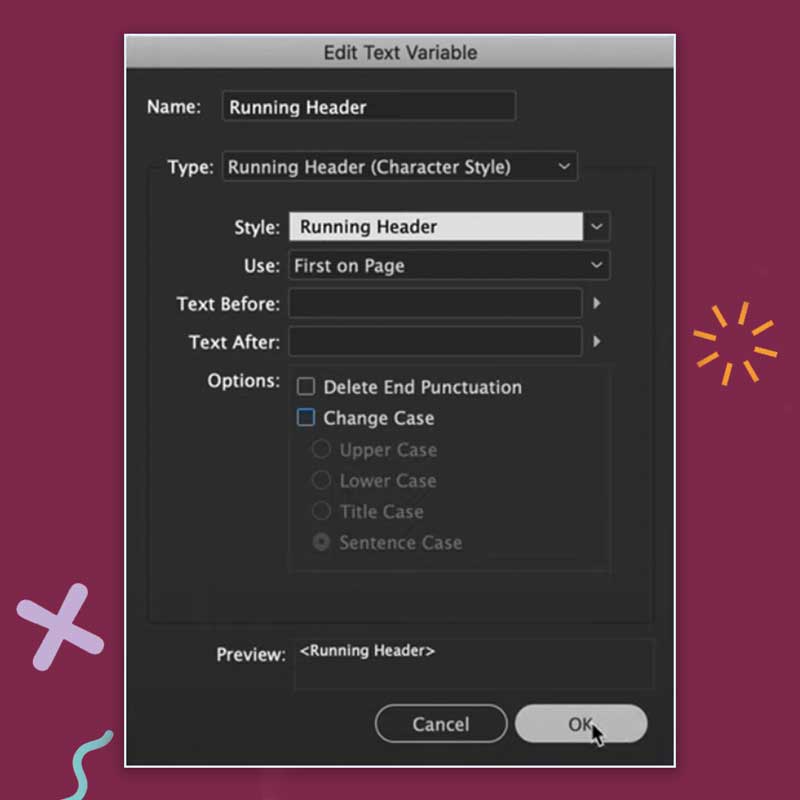
The running header needs to be specified as a text variable. The running header definition will already be created by default but we want to select our newly created blank character style.
We must go into the define option (found under Text Variables in the Type menu), choose the running header and edit to choose our blank character style. You will also find other options that can be changed here such as altering the text case.
If you want to follow along, make sure to watch Martin in action in the video.
3. Place the running header on the master page
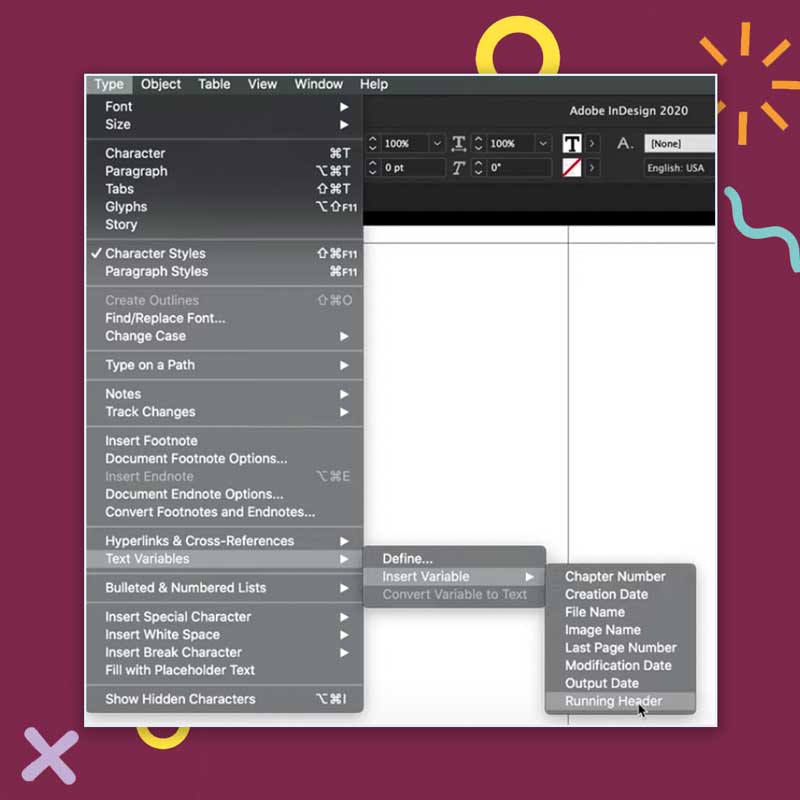
It is best to insert the running header on the master page. Within a text frame on the master page we can now insert a running header (found under Text Variables in the Type menu).
This now shows on the master page as <RUNNING HEADER> which means it’s a variable that is going to change on the different pages.
4. Apply the character style
We now need to define the titles that we want to use in the running headers by applying our newly created character style.
To do this you must go to the relevant spread and select the text frame containing the text you want to show in the header. Click on the newly created character style (in the character styles panel) to apply the style.
The header will automatically update to the contents of the text frame. You may need to refresh the page (by clicking on another spread and back again) for this to show on your document.
Going forward, if you make any changes to the title, it will automatically update the header so you don’t have to worry about manually updating the header if changes are made.
It’s a great, simple way to help create professional-looking documents that are going to always display up-to-date headings on the relevant page.
Don’t forget to watch the video to follow Martin as he guides you through the steps.

Are you interested in becoming a Graphic Designer or Illustrator?
Join 10,000+ creatives and subscribe to our FREE Graphic Design Survival Kit newsletter.
You’ll get instant access to our resource library and feel well equipped to make that next big leap in your design career.
LEARN ADOBE APPLICATIONS
from Adobe Certified Instructors and industry professionals
UP NEXT
Learn key editorial terms and definitions to help get started with magazine designs!


