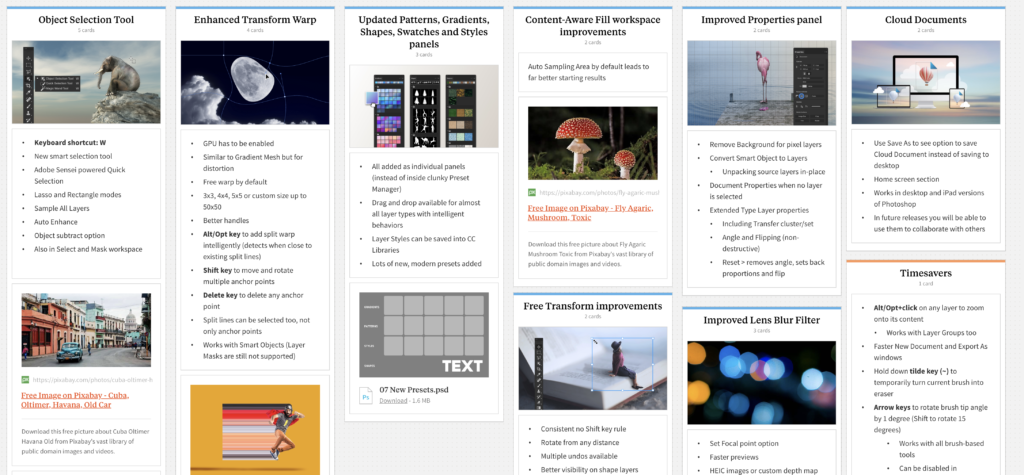
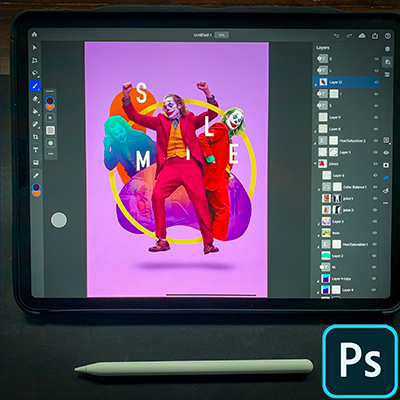
1. Object Selection Tool (Keyboard Shortcut: W)
This is probably one of the most useful new tools introduced to Photoshop in the last couple of versions. In CC 2019 we got the Frame Tool, which is supposed to work as an intuitive Clipping Mask, but in reality it is quite limited. On the other hand this new smart selection tool, powered by Adobe Sensei artificial-intelligence is a brilliant feature that will save a lot of time making selections.
It has two modes: Lasso and Rectangle, both working similarly to the familiar selection tools, but with the difference that the selection boundary quickly adjusts itself to the subject inside the selection. I tested this and it works very efficiently on all kinds of photographs, no matter what your subject is.
It is worth mentioning that this tool has also been added to the Select and Mask workspace.

2. Enhanced Transform Warp
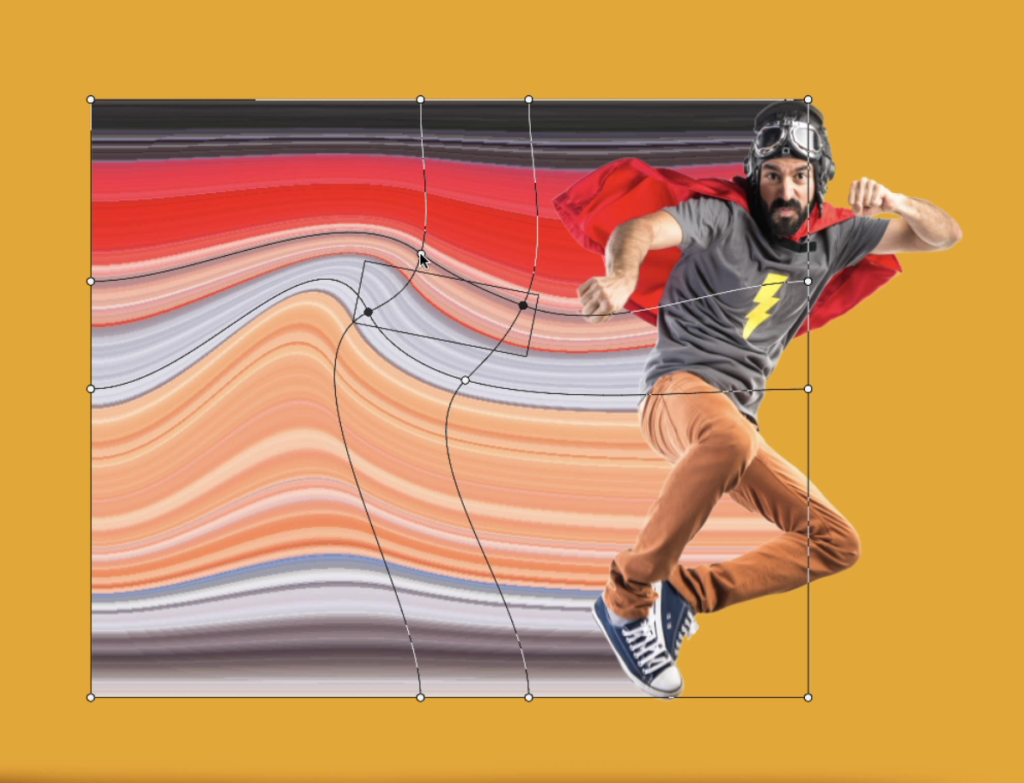
The Warp option finally got a complete revamp and it became much more powerful. In its new state it became a worthy competitor of the Puppet Warp and Liquify Filter. In a way it is similar to Illustrator's Gradient Mesh but used for distortion.
The Warp option used to work only with a 3x3 grid, while the new version has presets for 4x4, 5x5 and custom grids up to 50x50. You can manually place Split points on the mesh and use the following keyboard shortcuts to make amends:
- Alt/Opt key to add split warp intelligently (detects when close to existing split lines)
- Shift key to move and rotate multiple anchor points
- Delete key to delete any anchor point
The GPU has to be enabled in the Preferences for this feature to work.
3. Free Transform Improvements
In CC 2019 the developers updated the behaviour of the Free Transform feature and made the default transformation proportionally constrained. This means that it is not required anymore to hold down the Shift key to avoid stretching content. However this new behaviour only worked on certain type of layers not including Smart Objects for instance. Luckily in Photoshop CC 2020 they fixed and added several other updates to this crucial feature:
- Rotate from any distance
- Multiple undos available
- Better visibility on Shape layers
- Preferences > General - Use Legacy Free Transform or toggle the chain in Options bar (general override and sticky)
4. Improved Properties panel
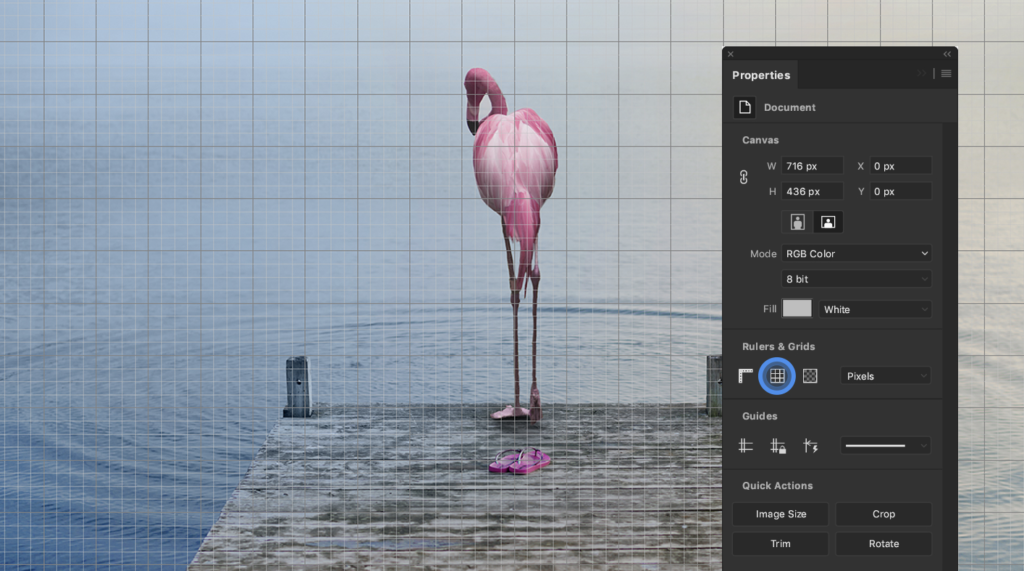
The Properties panel is now included in all of the main Adobe Creative Cloud applications (Photoshop, Illustrator, InDesign). It serves as a central hub of features in each software combining a lot of functions from other panels, menus and the Options bar.
The Properties panel in Photoshop CC 2020 is context-sensitive, always updating and showing relevant options based on the currently selected layer. Here are few of the updates and improvements introduced in the this version:
- Remove Background for pixel layers
- Convert Smart Object to Layers (Unpacking source layers in-place)
- Document Properties when no layer is selected
- Extended Type Layer properties (including Transfer cluster/set with non-destructive Angle and Flipping options)
5. Content-Aware Fill workspace improvements
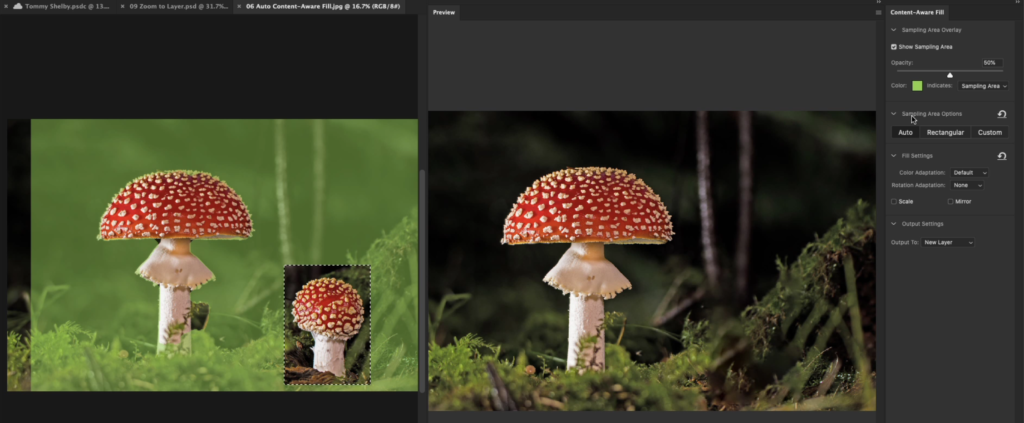
Thanks to the Auto Sampling Area option the Content-Aware Fill option leads to far better starting results for all selections. This option is making it even easier to remove unwanted details from photos.
6. Updated Patterns, Gradients, Shapes, Swatches and Styles panels
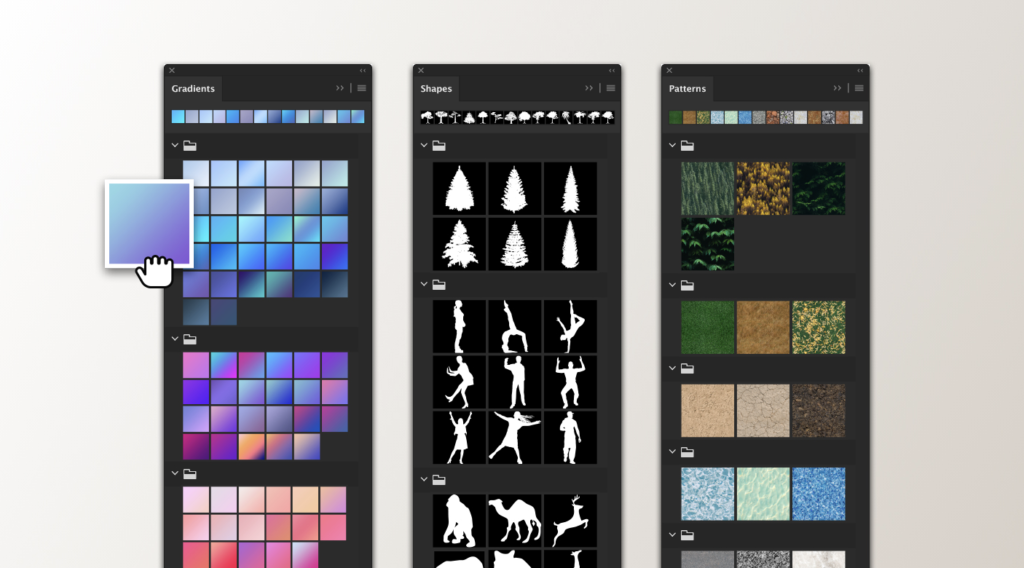
In Photoshop CC 2020 we got a completely refined way of working with Presets. Patterns, Gradients, Shapes, Swatches and Styles are now all available as individual panels and are removed from the clunky Preset Manager.
Thanks to this update we can now finally create Groups for each of these presets to keep them more organised.
The biggest advantage however is the ability to drag and drop all kinds of presets onto any Layer types. There are also lots of new, modern presets added and Layer Styles can now be saved into CC Libraries.
7. Improved Lens Blur Filter
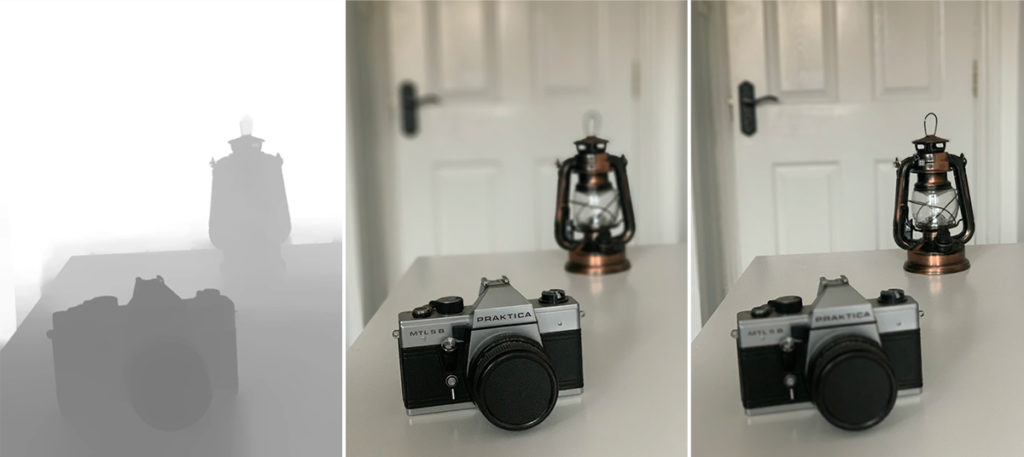
It is now possible to Set Focal Point within the Lens Blur filter, which works especially well if you have a Depth Map available for a photograph. Photos taken with the Lightroom CC app can capture this information if the relevant Technology Preview feature is enabled in the settings. The HEIC images captured this way will store depth information in an Alpha channel, which will be activated when the Lens Blur opens up.
Besides the new Set Focal Point option the filter also got a performance boost, utilising the GPU.
8. Cloud Documents
With the introduction of Photoshop for iPad, Adobe decided to also create a new file format (PSDC - Photoshop Cloud Document). This allows saving layered Photoshop working files into the cloud and making them available on any device connected to the internet, including iPads.
You will get a notification the first time you try using the Save As command:

The most exciting aspect of Cloud Documents is that in future releases you will be able to use them to collaborate with others. This most likely means that multiple users will be able to work on the same Photoshop Cloud Document simultaneously, similar to the new feature introduced in Adobe Xd.
9. Timesavers
Finally here is a list of additional gems introduced in Photoshop CC 2020:
- Alt/Opt+click on any layer to zoom onto its content (works with Layer Groups too)
- Faster New Document and Export As windows
- Hold down tilde key (~) to temporarily turn current Brush into Eraser
- Arrow keys to rotate brush tip angle by 1 degree (Shift to rotate 15 degrees)
- Close Others option in File menu
- Layer Comps can now track Smart Object’s Layer Comp settings
- Import from iPhone and iPad (Mac-only)
1. Intuitive Simplify Path
In Illustrator CC 2020 the Simplify Path feature got much smarter and more intuitive to use. You can significantly reduce the amount of anchor points in your illustrations without recognisably changing the outline of your paths.
You can find the feature in the menus under Object > Path > Simplify Path.
Additionally the Remove Anchor Point Tool got smarter too in this release, allowing a more precise path redrawing algorithm when using the tool while holding down the Shift key. With this new shortcut the tool will ensure that your path stays as close as possible to the original shape after removing anchor points.

2. Background Save
It can take quite a long time to save big files in Illustrator and in past versions you had to wait around until the dreaded progress bar disappeared. With Illustrator CC 2020's Background Save this is not the case anymore. Now each time you save a document you will be able to continue working on the same document or even open another file, while the first document is being saved in the background.
It is worth mentioning that at this point the Background Save option only works with the native Illustrator file format (AI), but hopefully soon it will also work with other file common types (EPS, PDF, etc.).
Besides this there are also a lot performance improvements making Illustrator CC 2020 running noticeably smoother and more efficiently than previous versions.

3. Auto Spell Check
Illustrator can now automatically highlight grammatical errors in over 50 languages as you enter text. This feature is not yet supported for East Asian languages. This option is not active by default and it needs to be enabled in the menus: Edit > Spelling > Auto Spell Check.
If you prefer to run manual spell check you can also do this by starting the Spell Checking command from the same menu as above or by pressing Cmd/Ctrl+I keyboard shortcut.

4. Recolor Artwork for Freeform Gradient
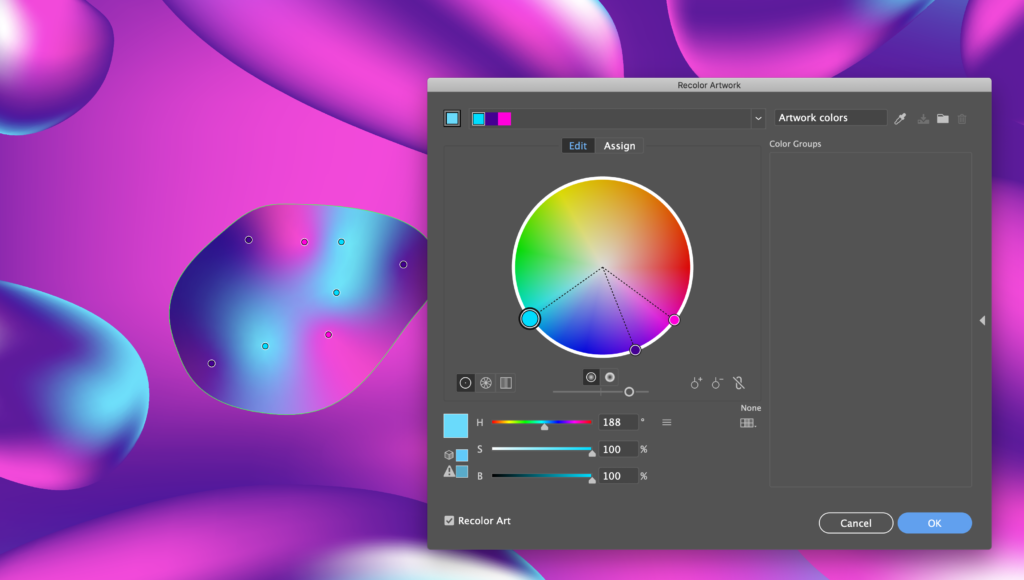
This might seem like a minor improvements, but for those who use these two features often this is a game-changer. Freeform Gradient was undeniably the most exciting new feature of Illustrator CC 2019 and with this update it just got even better.
Recolor Artwork is the most advanced recoloring method in Illustrator and it is great to be able to apply it to objects with Freeform Gradients on their fill colors.
Adobe InDesign CC 2020
1. Find Similar Images
Thanks to Adobe Sensei artificial intelligence making its way into InDesign we can now quickly find alternatives for any of our images used in InDesign documents. All you need to do is to right click on an image and you will get similar image results in the CC Libraries panel.
This feature relies purely on the Adobe Stock library, which is not included in the Creative Cloud subscription, so if you are planning to license any assets from it you will have to pay separately by buying credits.
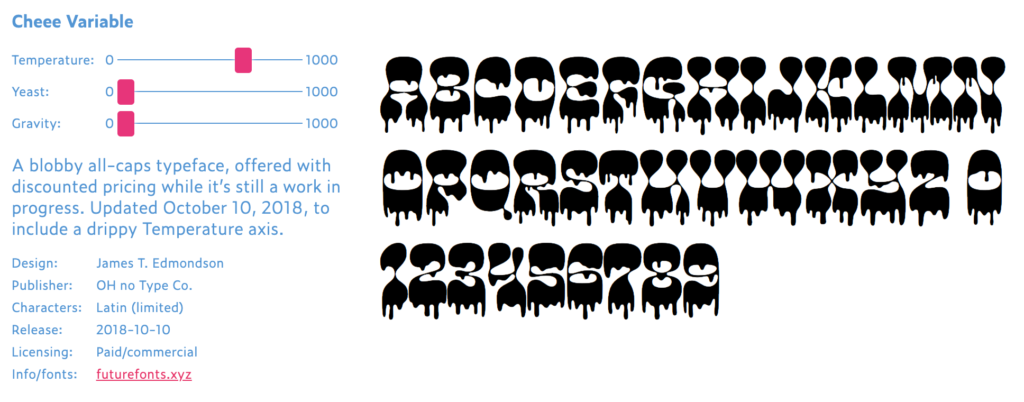
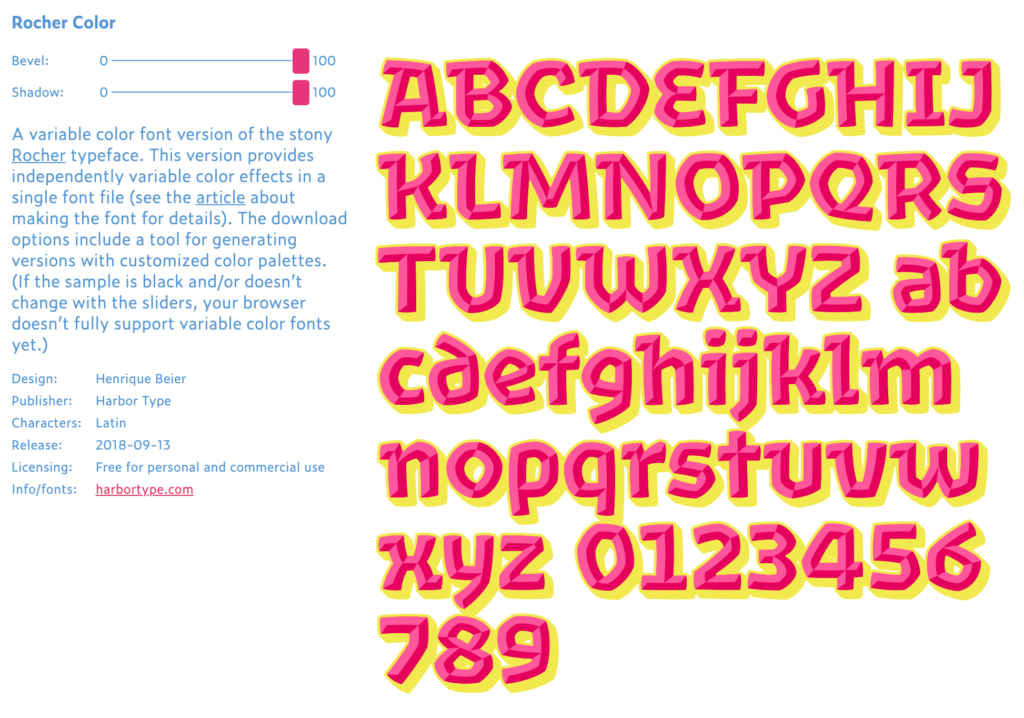
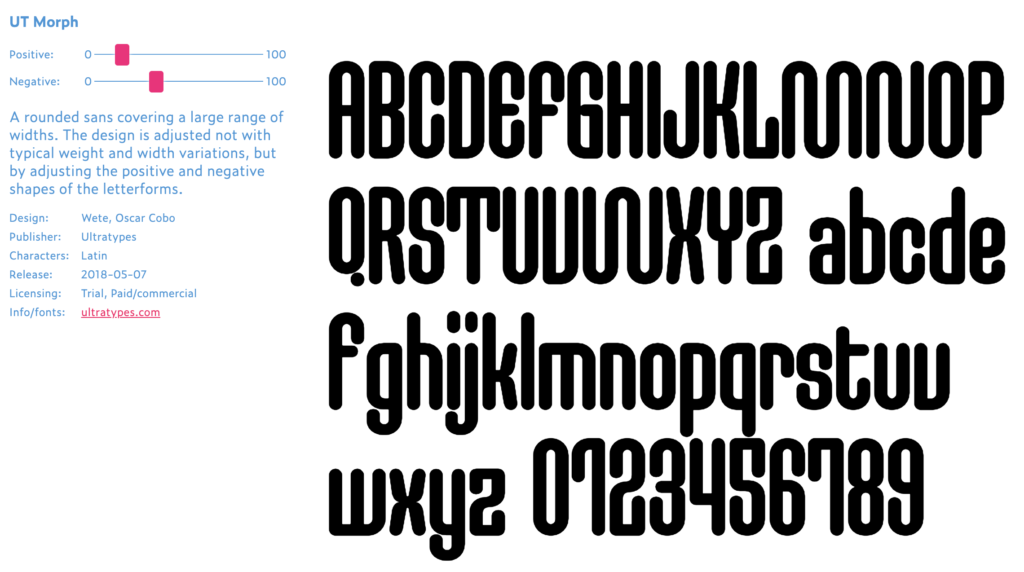
2. Variable Fonts
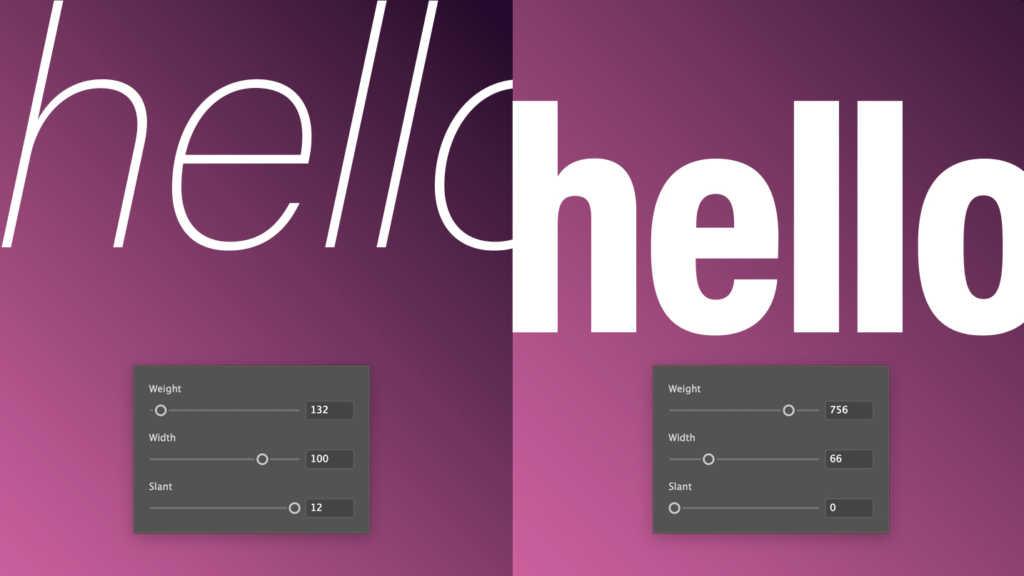
This new font technology was first introduced to Photoshop, then to Illustrator and now finally it made its way to InDesign. The key difference with these type of fonts is that you have attributes to control the appearance of your text instead of relying on manually selecting the right style (Bold, Italic, Condensed, etc.).
This means that a Variable Font can have hundreds of style variations but thanks to the attributes you can very quickly pick the version right for you. Adobe Fonts offers some Variable Fonts but unfortunately currently there is no way to quickly filter them on the website.
V-fonts on the other hand is a great resource of Variable Fonts collected from various sources. The best thing about this site is that you can also test the attributes of the fonts in the browser.
Here are a few really cool examples worth downloading and testing out in InDesign:
3. Column Rules
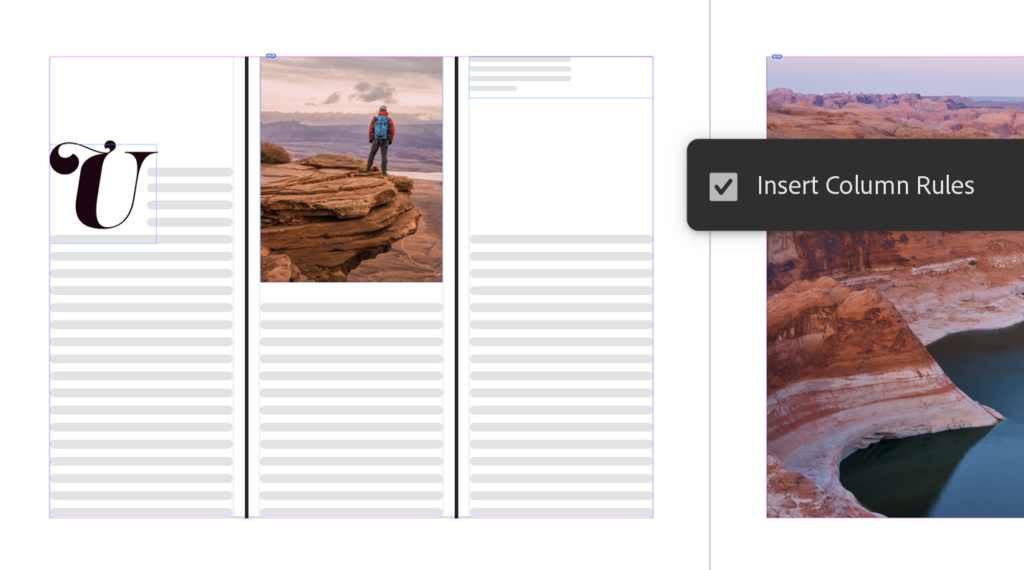
In InDesign CC 2020 we also got a new and useful feature to add rules (lines) between columns. This option was added into Text Frame Options and it is also available inside Object Styles, which makes it easy to quickly re-apply if you are planning to use it several times within a document.
It's worth mentioning that from now on you can also assign shortcuts to InDesign Styles even if you don't have a NumPad on your keyboard. This used to be a restriction in past versions.
4. SVG compatibility
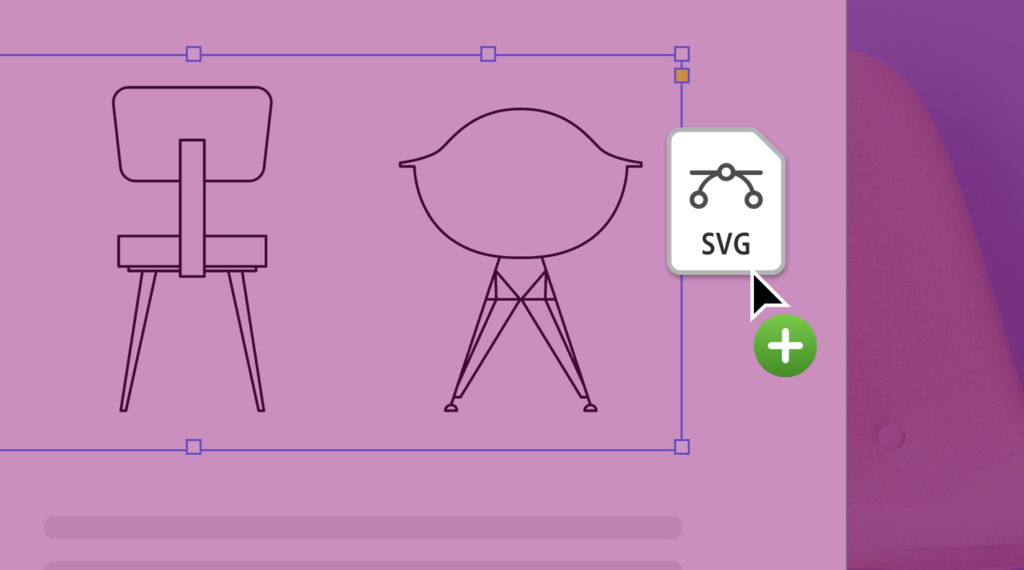
Last but not least we also have the ability to import SVG (Scalable Vector Graphics) into InDesign. These files are similar to EPS and PDF files, with the difference that they can be used in web browsers.
The ability to use them in InDesign can be especially handy if you are using the Publish Online feature and sharing your documents with people online. Using SVG files in this case will result in always crisp graphics no matter the user's screen resolution.
I hope you found this article useful and it made you excited to test out some of the new CC 2020 features in action. Don't forget to check out the Milanote boards I created for each Adobe application and download the examples I prepared:
UP NEXT
Photoshop for iPad
It was first announced at Adobe MAX in October 2018 and since then everyone has been eagerly waiting for its official launch. Finally, the wait is over!
GRAPHIC DESIGN
& ILLUSTRATION
Adobe Certified Online Courses


